Quick Start Guide
The Quick Start Guide contains very basic procedures. It isn't designed to teach everything, just the most commonly used tasks in order to get you started as quickly as possible. This section is aimed specifically at new-starters and contains instructions that you are most likely to use in your first few days of using Accuro. The aim is to give sufficient information to be able to perform the routine tasks within the office.
In Accuro many functions have more than one way of doing them. In the Quick Start Guide we only show what we consider to be the quickest (and easiest to remember) way of doing a task.
With the procedures in this section and a quick overview from a colleague, you should be ready to use the Accuro software in as little as 15 minutes.
 Watch our Getting Started in Your Clinical Role Webinar for more details on this topic!
 See Welcome to Accuro EMR on Accuro Learning Academy (ALA) for additional help on this topic! See Accuro Learning Academy for access.
Register a New Patient
- From anywhere in Accuro, Press F6.
- A New Patient window is displayed. Complete as much information as possible. Where there is a red dot, these fields must be completed.
- When finished, click Add to register the patient.
Select an Existing Patient
A patient can be selected in any module of Accuro, for this example we are doing it in the Scheduler.
- Click the Scheduler icon
 on the Accuro Navigation bar.
- On the right-hand side of the screen in the Patient field start typing in the patient last name. A list of matching patients is displayed.
Note: You can also type in the patient's last name followed by a comma and then their first name.
- A list of patients with this name are displayed, click to select the appropriate patient. This patient is now selected.
Search for a Patient
In many areas of Accuro a user can search for a patient. The patient search is located at the top of the window and looks like the examples shown below:

A patient can be searched for by typing in any of the following information:
Name:
- Patient's full name
- Last name
- First name
- Partial name
- Last name, first name
Telephone Number:
- Omit the area code and use the format 123-4567
Health Card Number:
- Omit any spaces or hyphens
File Number:
- Type in the patient's file number
Date of Birth:
- Type in the date of birth in the format mm/dd/yyyy
Make an Appointment
To make an appointment for the patient currently selected:
- Click the Scheduler icon on the Accuro Navigation bar.
- Click the appropriate appointment slot.
- Hold down the Shift key and Press Enter.
- The Appointment Details window is displayed, click OK.
Cancel an Appointment
- Click the Scheduler icon on the Navigation bar.
- Right-click the appointment and select Cancel Appointment.
Note: The following shortcut key can be used to cancel an appointment Ctrl+D, or press and release the Alt button on the keyboard, click Scheduler and select Delete Appointment.
- Click Yes to confirm the cancellation.
- Type in a cancellation reason or click the
 and select a cancellation reason from the list displayed.
- Click OK. The appointment has now been cancelled.
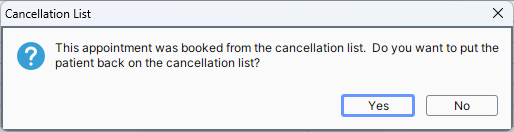
Note: When an appointment is cancelled that is tied to the wait list the user is asked if they want to put the patient back on the wait list. If the user clicks Yes then a window is displayed and they are given the option of changing the wait list status to one of the following: Booked, Completed, Cancelled, Deceased, Tentatively Booked or Re-Book.
Mark a Patient as Arrived
- Click the Scheduler button on the Navigation bar.
- Click to select the appropriate patient's appointment.
- Press and release the Alt button on the keyboard, click Scheduler and select Patient Arrived from the list displayed.
Note: A shortcut is right-click on the appropriate appointment and select Arrived from the dropdown list displayed.
An [A] appears next to the patient's name on the appointment indicating to other users that the patient has arrived.
Move a Patient to a Treatment Room
- Click the Traffic button
 on the Accuro Navigation bar.
Patients in the Waiting Room are displayed in the top of the window and the Treatment Rooms are displayed in the bottom of the window.
- Click to select the appropriate patient in the waiting room. Holding down the left mouse button drag the patient into the appropriate treatment room.
- Release the mouse button and the patient's appointment details are displayed, click OK to confirm.
The patient's details are now in the selected treatment room.
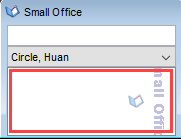
Note: Drag the patient details into the red-highlighted area of the treatment room, see below, any other area in the treatment room does not move the patient:
Tip: If all of the patients in the Waiting Room cannot be seen on the Waiting Room list in Traffic. Click Scheduler and verify that all patients have been marked as arrived, then go back to Traffic.
Add Notes to a Patient's EMR
- Click the EMR button
 on the Accuro Navigation bar and click the Encounter Notes tab.
- In the Clinical Notes section in the middle of the screen, click and select either the Notes template or Forms template you want to use from the list displayed.
The template you selected opens, complete as required. When you save, a copy of the document is attached to the patient's EMR.
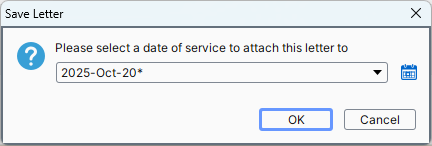
Note: If a note is entered for a patient who has an appointment without an Encounter Note attached, you are prompted to select a date of service to attach the letter to.
Prescribe Medication
- Select the appropriate patient.
- Click the EMR button on the Accuro Navigation bar.
- Click the Medications tab across the top of the window.
- Click the New Prescription button.
- In the Medication Search field, type in the name of the drug, click
 .
.
- Click to highlight the correct form of the medication in the list that is displayed.
- Click the and select the appropriate Route.
- Click the and select the Drug Use.
- Click
 on the Prescription tab and complete the prescription dosage. Click OK to save.
- If the Auto Calculate Quantity checkbox wasn't selected in the previous step, select the quantity.
Note: The Auto Calculate feature only works when the units are consistent with the item prescribed.
- Click Save and Close. The prescription is saved to the patient's EMR and a copy of it is displayed.
- Click either the Print or Fax button to print a copy or send a copy to a patient's selected pharmacy.
Renew a Medication
Where a medication has already been prescribed to a patient, it is very simple to renew a medication. With the correct patient selected:
- Click the EMR button on the Accuro Navigation bar.
- Click the Medications tab.
- Click to select the appropriate medication. Where there is more than one, hold down the Ctrl key and click the appropriate medications. Selected medications have a yellow background.
- Right-click anywhere on the highlighted medication(s) and select Renew.
- The Manage Prescription window is displayed. If any of the quantities or dosages have changed, update as required. If multiple drugs are being renewed, click each one in the Script History pane and review individually.
- Click OK (or Save and New if more medications are being renewed).
- If prescriptions by different Provider(s) are selected a message is displayed. Medications are grouped separately and printed separately. Click OK.
- Click Print to print the prescription or Fax to send it to the patient's chosen pharmacy. If more than one prescription is displayed, repeat this step, as required.
Generate a Referral Letter in Encounter Notes
- Select the appropriate patient.
- Click the EMR button on the Accuro Navigation bar and click the Encounter Notes tab.
- In the Clinical Notes section click the drop arrow as shown below:
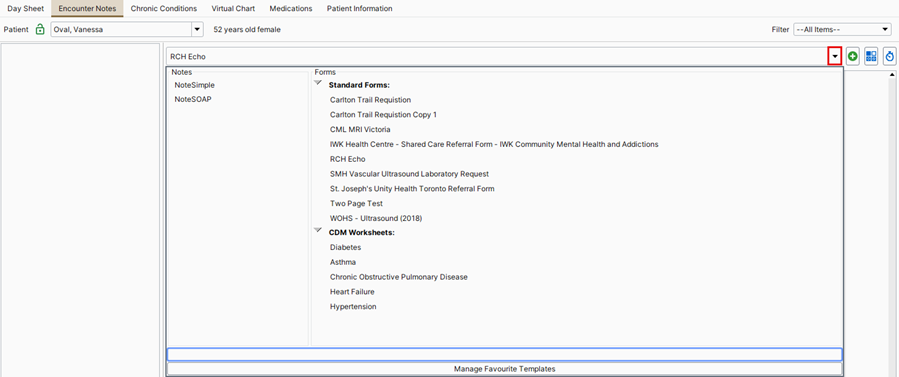
- Select the appropriate template from the list displayed.
- Click the drop arrow (see below) and select the date of service. Click OK.
- Complete the document as required.
- Click OK to save. The document has been added to the clinical notes.
- Right-click on the appropriate letter and select Generate Letter. The Letter Generate window is displayed.
- Click the Search button and select the recipient from the Address Book displayed. Click Select.
- To send carbon copies of the selected letter click the Add button and select these recipients from the Address Book displayed.
- Click the and select the Header and Footer, if required.
- In the Attachments section click the Add button and select any attachments, if applicable.
- Click Send Letter or Print, as required.
Bill for a Patient
For patients seen today, the easiest way to bill is from the Day Sheet.
- Click the EMR button on the Accuro Navigation bar.
- Select the Day Sheet tab if it is not already displayed.
- Right-click on the appropriate patient and select View Bill.
- Complete the billing details as required. Click Save and Close when completed.
Complete a Patient's Visit
When a patient's visit has left the treatment room, they need to be marked as completed.
- Click the Traffic button on the Accuro Navigation bar.
- Right-click on the patient in the treatment room and select Completed from the list displayed.
The patient is removed from the treatment room which is now shown as being empty.
Tip: To View all completed visits for the day, click the completed button in the Traffic Manager window.