Accessing GoNet Using Windows Hyper Terminal (ON)
Question: How do I access GoNet using Windows Hyper Terminal?
Answer: Follow the setup procedure below:
Please read the following information about Hyper Terminal before you start this procedure Hyper Terminal for Windows.
- On your computer click the Start button in the bottom-left corner.
- Select Accessories, Communication and Hyper Terminal.

The following window is displayed:
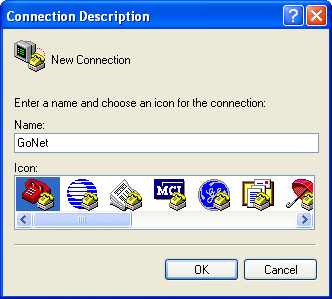
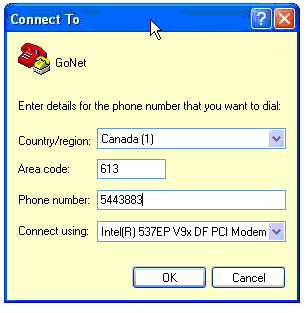
- Click to select an Icon and type in the name GoNet. Click OK. The Connect To window is displayed:
- Click the
 to the right of Country/Region and select Canada (1).
- Type in your Area code.
- Type in the modem number for the office you submit to.
- Click the to the right of Connect using and select your modem from the list displayed.
- Click OK. The Connect window is displayed:
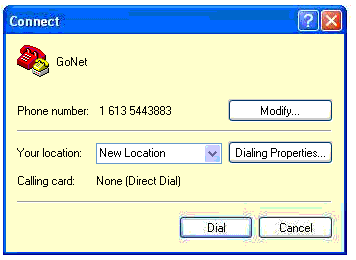
- Click the Dial button. Once the connection to GoNet has been established, the GoNet Hyper terminal is displayed:
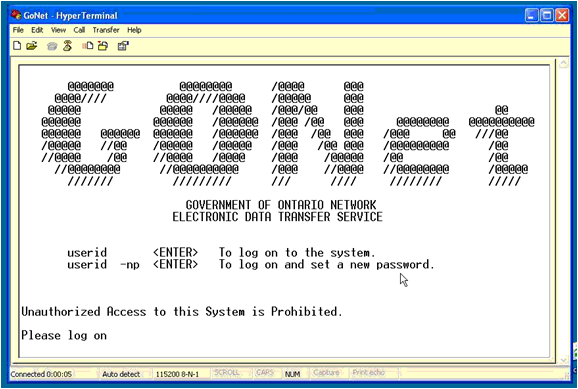
- Type in your MOH number and Password.
Send a Claim Using GoNet (ON)
- Log into GoNet. If you need help setting up GoNet see Accessing GoNet Using Windows Hyper Terminal.
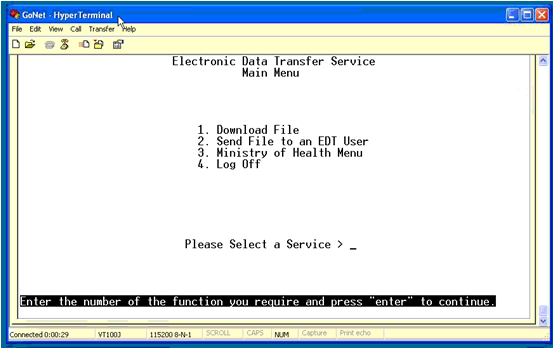
- Select option 3. Ministry of Health Menu but if there is an option to Send File (not shown here) then select that option.
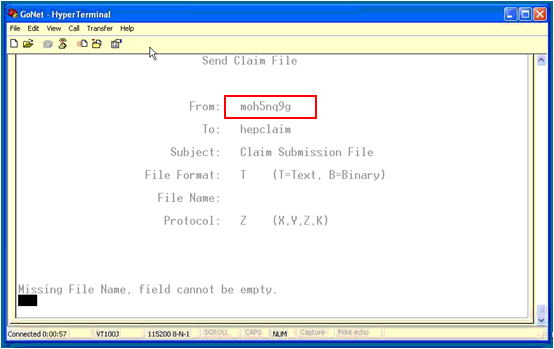
- Type in the MOH Number in the From field. Ensure all other fields are completed (including the file name).
- Click Transfer on the Menu bar and select Send File from the list displayed.
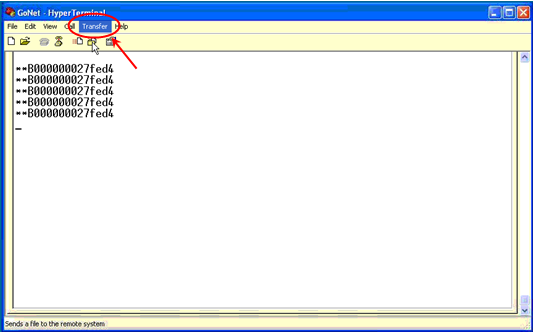
The Send File window is displayed:
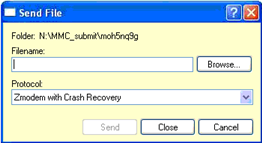
- Browse to the location of the file and select the appropriate file.
- Click Send.
Pick up a Remittance Using GoNet (ON)
- Log into GoNet. If you need help setting up GoNet see Accessing GoNet Using Windows Hyper Terminal.
- Select option 1. Download File. A window with all the files to be downloaded is displayed:
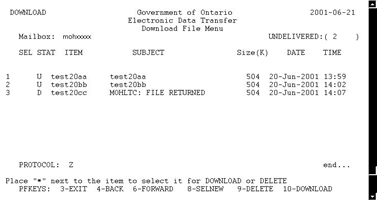
- Place an * beside the files to be downloaded and then press Escape+0 (Escape+Zero) to start the download.
Note: The display says to press F10 to download but this does not work Escape+0 must be used.