See Communication and Documents - Core for Administrative Staff on Accuro Learning Academy (ALA) for additional help on this topic! See Accuro Learning Academy for access.
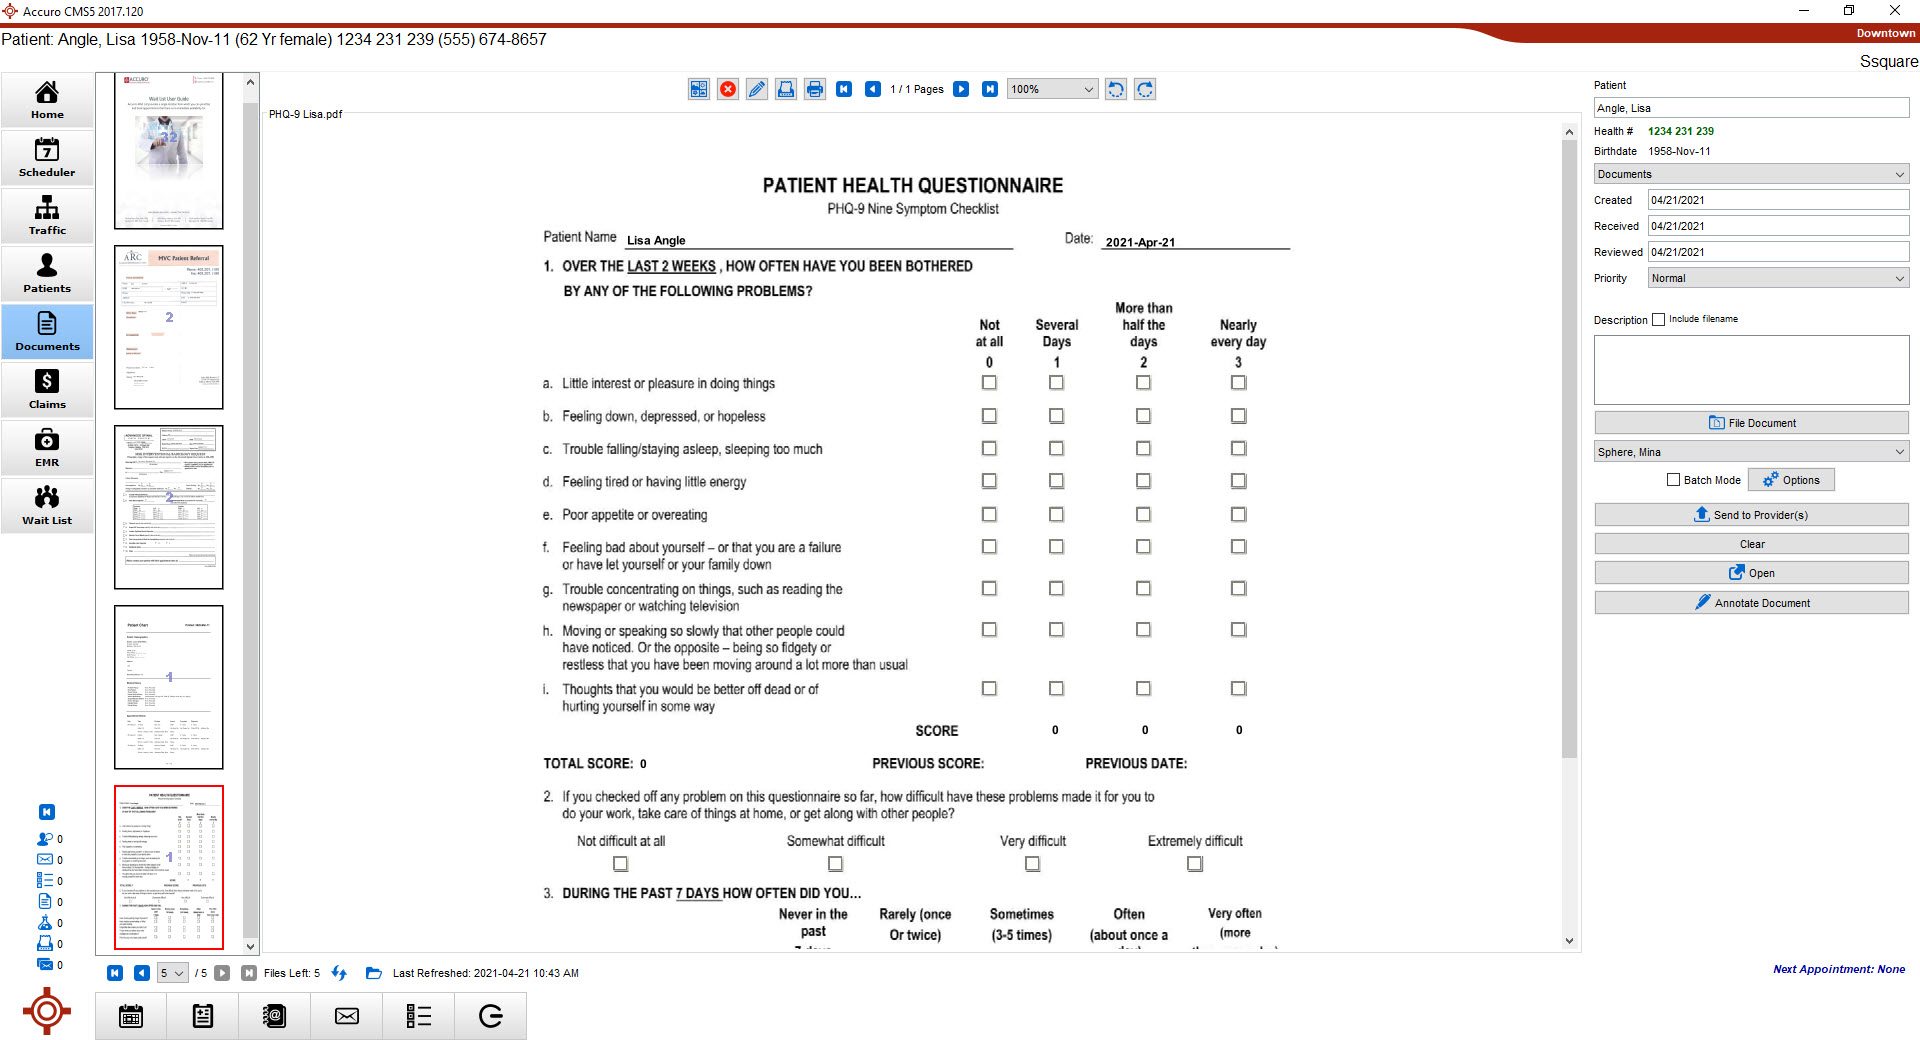
The Documents section is used to import electronic documents into Accuro and associate them with a patient's EMR. Documents, such as faxes and scanned in items, can be viewed, manipulated, sent to providers for reviewing and attached to patients' Virtual Charts.
See Communication and Documents - Core for Administrative Staff on Accuro Learning Academy (ALA) for additional help on this topic! See Accuro Learning Academy for access.
Before documents can be viewed, a directory on your hard drive or network where the documents are located must be defined.
 on the Accuro Navigation bar.
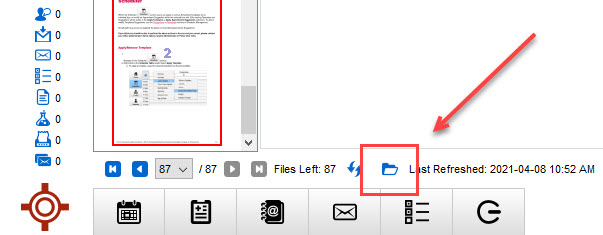 at the bottom of the screen.
If a folder contains multiple documents, browse between them to find the one(s) you want.
on the Accuro Navigation bar.

 at the bottom of the screen to navigate between documents in the folder. The inner two arrows move between documents one at a time in each direction. The outer two arrows move to the first and last document, respectively.
Note: Only the arrow keys at the bottom of the screen browse between documents. The arrow keys at the top of the screen browse between pages in the currently selected document.
The Thumbnail button  toggles between hiding and displaying the thumbnails. If the thumbnails are displayed, click and they are hidden. If the thumbnails are hidden, click and they are displayed.
on the Accuro Navigation bar. located at the top of the window.Note: The thumbnail button only displays thumbnails for the currently selected document. The "Show/Hide Document Thumbnails" setting in Document Options displays thumbnails for all documents.
Users have the option to move documents to a Deleted folder rather than permanently deleting documents. This means that if a document is deleted in error, provided the "Do not delete documents permanently. Move deleted documents into Deleted folder" checkbox is selected then the documents can be recovered.
on the Accuro Navigation bar to access the documents. located at the in the top area of the screen.
Alternatively, right-click a document in the Document Thumbnails, and select Delete.
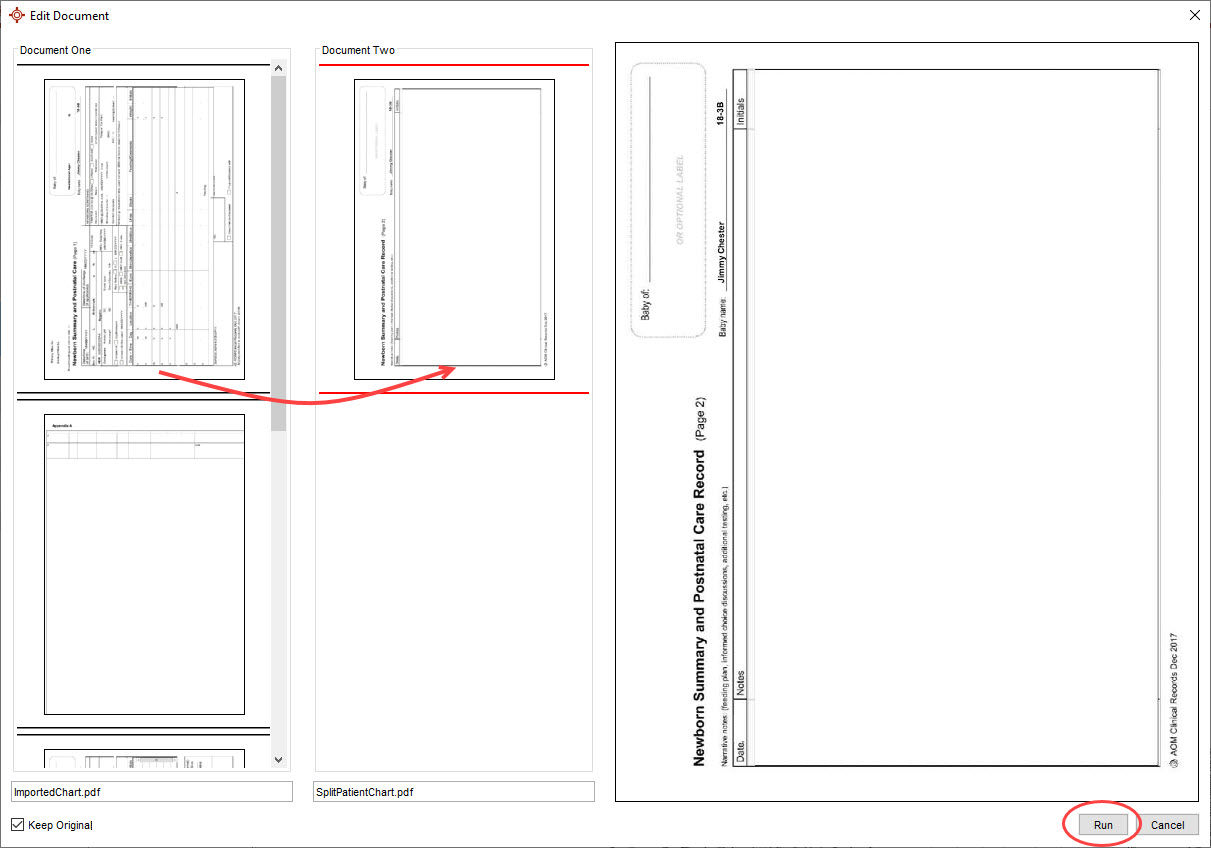
Users can split multi-page documents by using the Edit Document feature.
on the Accuro Navigation bar to access the documents. at the top of the window
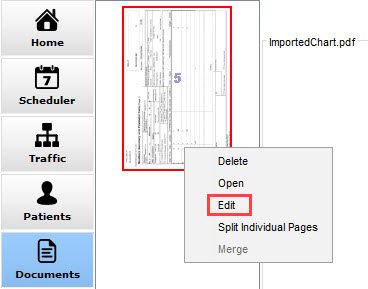
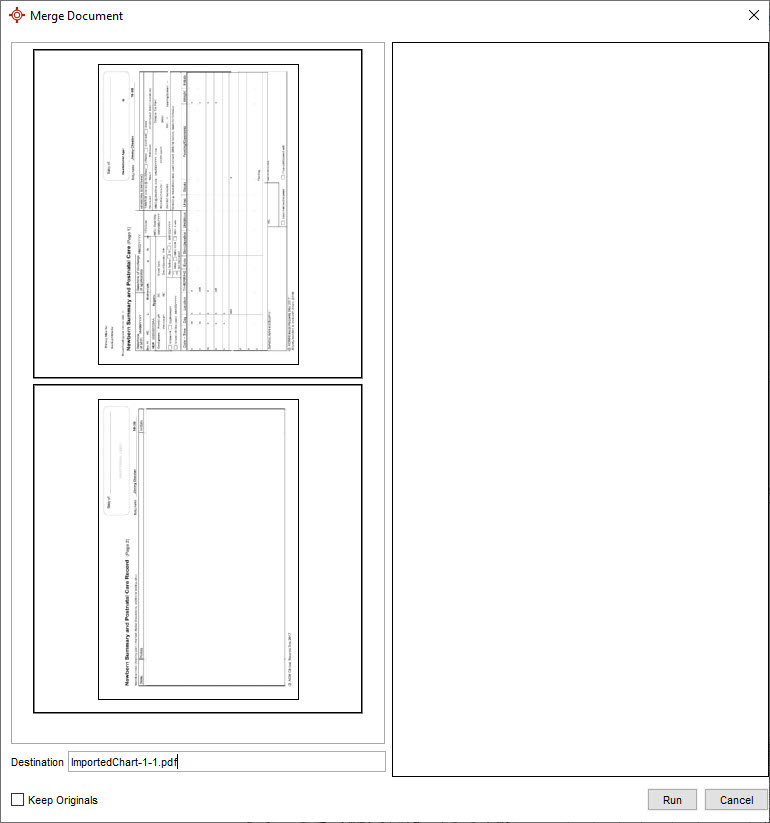
Users can merge multiple documents into a single document by using the Merge Document feature.
on the Accuro Navigation bar to access the documents.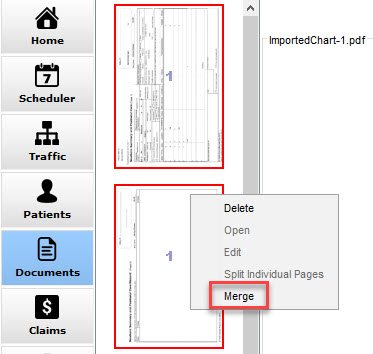
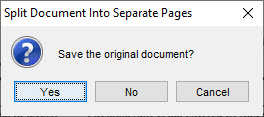
Users can split a document into individual pages the Split Individual Pages feature.
on the Accuro Navigation bar to access the documents.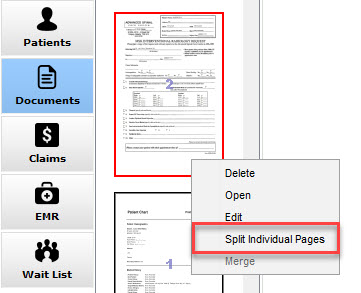
 on the Accuro Navigation bar to access the documents.
 .
.Note: Faxing a document does not require a patient to be assigned to the document being faxed. For this reason and because the faxing is not recorded on any patient charts, the document being faxed is recorded in the Audit Logs.The faxed document will be recorded in the Audit Logs. A warning is displayed to the user indicating the fax is not associated with a patient and the cover sheet message will not be saved to a chart.
on the Accuro Navigation bar to access the documents. .
.Sometimes a document contains more than one page. One document may contain pages related to different patients which must be split apart and filed separately.
on the Accuro Navigation bar to access the documents. at the top of the screen to move between pages of a multi-page document. The inside keys move one page at a time in the direction of the arrow. The outside keys move to the first and last page, respectively., located at the top of the screen.Zoom in and out of documents for easier reading.
on the Accuro Navigation bar to access your documents.
Sometimes documents are scanned in upside down or even sideways. In these cases the documents can be rotated for easier reading. Accuro saves the changes made when you file the document to a patient's Virtual Chart.
on the Accuro Navigation bar to access the documents. . A document can be rotated 90°, 180°, and 270°.
To save a document in Accuro you must file it to a patient's Virtual Chart.
on the Accuro Navigation bar to access the documents.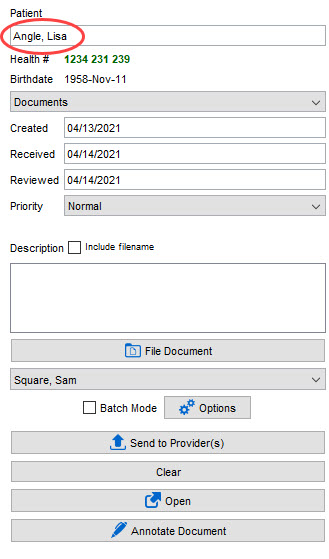
When filing multiple documents with the same settings (ie. date, document type, priority, etc.) enabling batch mode will retain the information rather than resetting after a single document if filed.
on the Accuro Navigation bar to access the documents.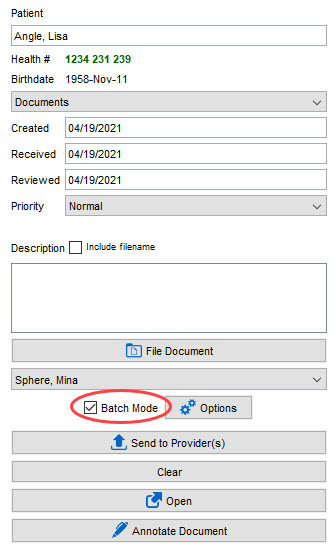
Note: Disable Batch Mode once batch filing is complete to have the above selected reset after filing each document.
The Options Configure button  in the Documents Section allows users to configure various Document Options.
Clicking the Options Configure button opens the Document Options window.
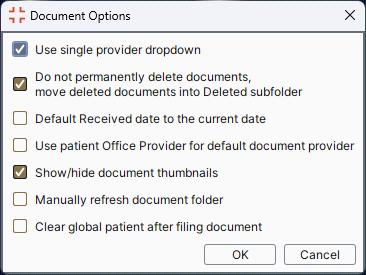
Use single Provider dropdown when filing documents: Allows for a single Provider to be selected in the Provider dropdown. When disabled, users are able to send a document to more than one Provider.
Do not permanently delete documents, move deleted documents into Deleted subfolder: When deleting documents, they move to a Deleted folder rather than deleting documents completely. This means that if a document is deleted in error, provided the "Do not delete documents permanently. Move deleted documents into Deleted folder" checkbox is selected, then the documents can be recovered.
Default Received date to the current date: When enabled, the document Received Date automatically populates the Current Date. When disabled, this setting keeps the Received Date blank. If the field is left blank then the Received Date will display as the Created Date in the Virtual Chart.
Use patient Office Provider for default document Provider: The Provider in the dropdown will automatically change to the patient's Office Provider, from the Patients Section, if an Office Provider is assigned to the patient.
Show/hide document thumbnails: Enables the thumbnail preview for all documents in the documents section.
Manually refresh document folder: The Documents Folder by default will automatically refresh after filing a document.
Clear global patient after filing document: Enables automatic clearing of the globally selected patient after filing each individual document. This setting is disabled by default.
Note: These settings are user specific.
on the Accuro Navigation bar to access the documents.Note: To send a document to multiple providers, disable the "Use single Provider dropdown when filing" settings in the Document Options window.
It is possible in Accuro to upload documents to a patient's EMR without having to select a Provider.
.Documents being marked as unread has been made optional in some circumstances. This is because when uploading old charts into Accuro, clinics would like the option of these not being flagged as new.
To clear Date Received, Reviewed, the Priority, and Description fields all at once, select the Clear button ![]() on the right side of the screen.
on the right side of the screen.
on the Accuro Navigation bar to access the documents. on the right side of the screen. on the Accuro Navigation bar to access the documents.
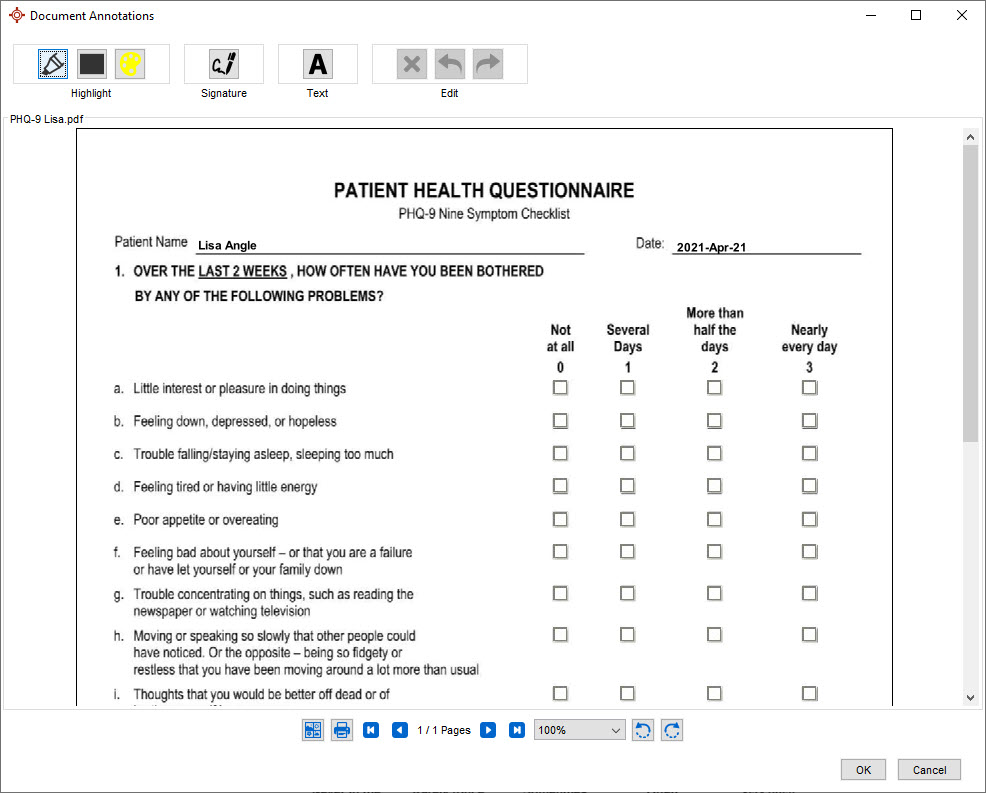
 on the right side of the screen. The Document Annotations window will appear.