 throughout this user guide for highlights on a helpful suggestion, shortcut, or best practice.
In this section, you will find tips and tricks for Accuro.
In addition, look for the Tip icon throughout this user guide for highlights on a helpful suggestion, shortcut, or best practice.
Customized patient flags can be displayed in the Status bar; these warn the user of any potential issues involving the current patient. These can be icons to help the user, e.g. patient is hard of hearing or to warn the user that the patient may have serious behavioral issues. An example of this is shown below:

In the example above, the following flags have been used:
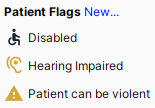
![]() is an Accuro flag showing that this patient has a -PP- (Patient Pays) invoice outstanding.
is an Accuro flag showing that this patient has a -PP- (Patient Pays) invoice outstanding.
Note: If you create and use customized patient flags, remember to give staff a list so they know what they mean!
 .
. , the Edit Alert Flags window is displayed. Click and repeat from step 5.
To create a colored square icon of your choice e.g.  :
:
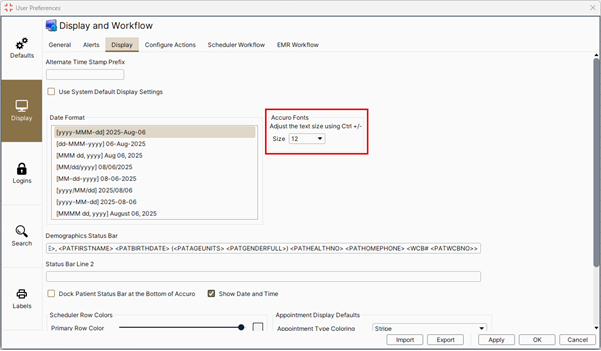
.Question: What font is used in Accuro?
Answer: Inter is the font used in the Accuro user interface. At this time, this is not modifiable.
If you prefer to have a larger sized font, it is possible to adjust the font size two ways. This is a user preference and so only affects your Accuro account and not the entire clinic.
Through keyboard shortcut:
Through User Preferences:
If a patient has lost a prescription, it is possible to re-print without having to renew the medications. Select the correct patient:
 on the Accuro Navigation bar and
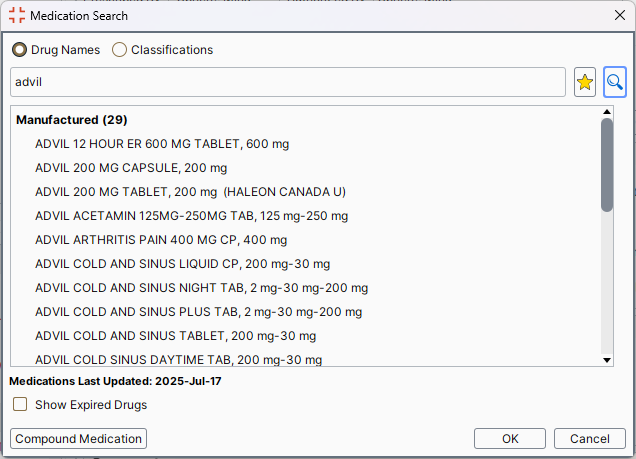
 section are listed all medications currently prescribed. Click to select the appropriate medication. If there is more than one, hold down the CTRL button and click on all the appropriate medications.
For medications prescribed on a regular basis, add them to the Favorite Prescriptions list. Each Provider can customize their own list with their preferred medications.
on the Accuro Navigation bar. , this brings up the Favorite Prescriptions window. and type in a name for your Favorite Drug. you are now in the Add Prescription window.
 .
. and select the prescription dosages. Click OK.
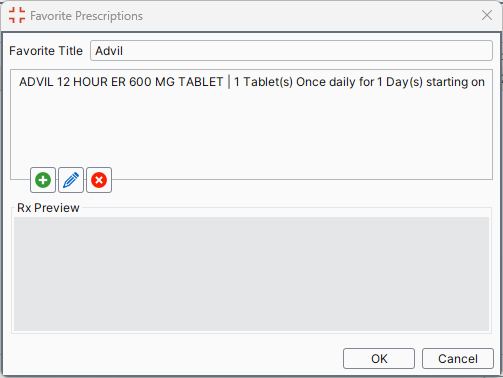
 .
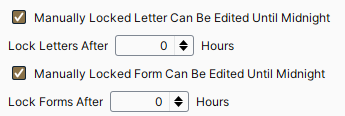
. Letters and forms created in Accuro are not automatically locked. If you would like the additional security of having these locked, Accuro has an option to do this. In the security section of Accuro, letters/forms can be set to lock after a set number of hours.
Note: If you cannot access this section of Accuro and you think you should be able to, please contact your office administrator.
Correctly setting up Appointment Types in your Scheduler can save offices a lot of time when it comes to doing your billing. When appointment types are set up, link to the fee code. Then when it comes to billing the codes required are already entered.
Note: This needs to be set up for each Provider, but once it has been done, it saves a lot of time.
When setting up the appointment type you can enter one fee code. Where there are multiple fee codes for an appointment type, create a macro to enable multiple fee codes to be entered.
Codes should to be linked to the appointment type before any appointments of that type are made. If there is already an appointment made for that appointment type, change the appointment type to something else and then change it back to the appointment type with the billing codes attached. The appointment then has the correct billing codes linked.
Link the referring doctor when setting up the Appointment. Then this field is also completed when it comes to the billing. Make sure reception staff do this when booking an appointment for a patient.
In any search field (e.g. Allergies) if you are not sure what you are searching for type %%% and then press the Enter key. A complete list is displayed.
Note: This works for any search field.
To create a template for the Scheduler follow this procedure in the order shown.
Press and release the Alt button, click Scheduler and select Templates & Suggestions.
Click the Manage Templates tab.
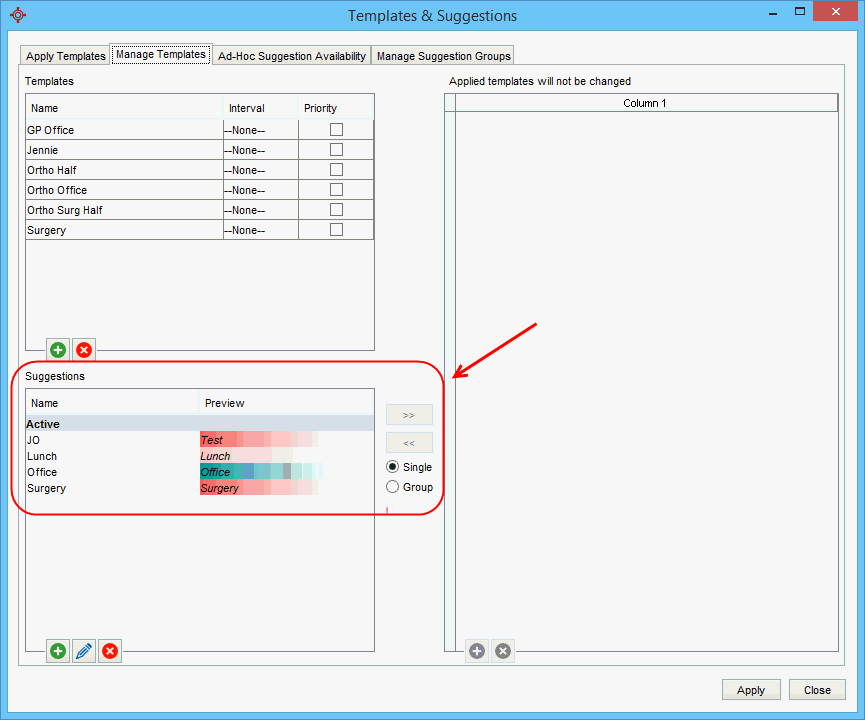
Create any new suggestions needed for the template. These are the color and what will be written in the appointment slot. This is done in the area of the window highlighted red:
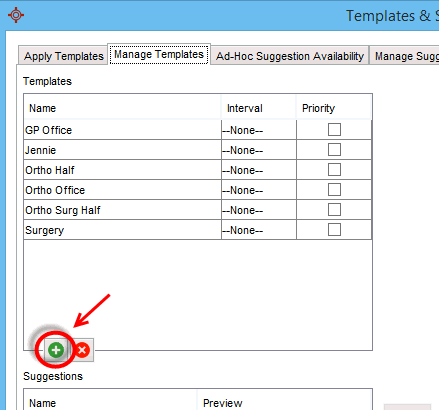
Click the Add button in the Templates area:
Type in the name of the template:
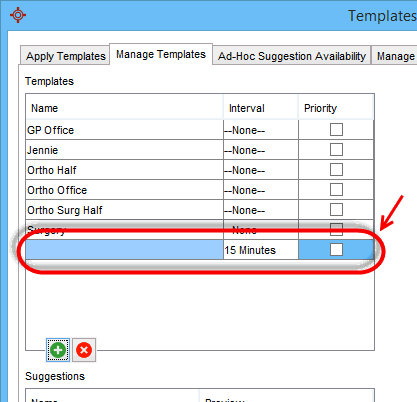
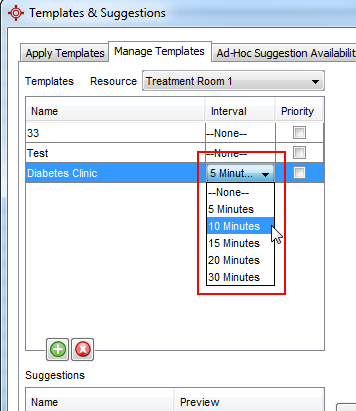
Click and select the appointment time interval:
If this is a Priority template select the Priority checkbox.
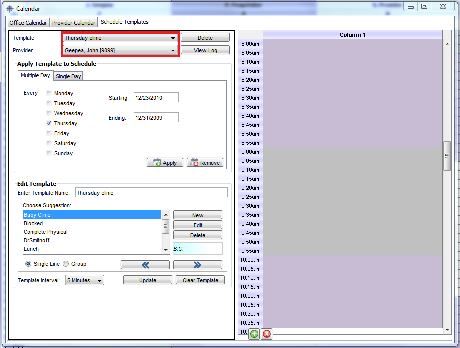
Select the Template and Provider(s) in the drop-lists displayed:
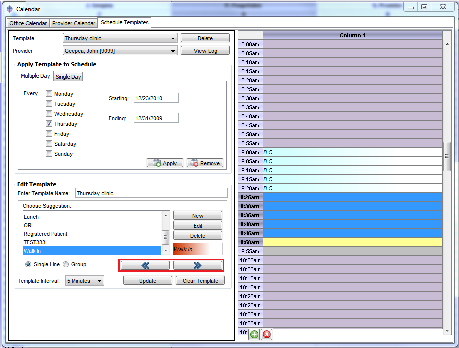
Select the appropriate suggestions and use the arrows to move them into the template. Repeat until you have the template displaying in the format you require:
Cut-Off dates vary from Province to Province. The calendar in Accuro contains the cut-off dates for your province. These are put in the calendar by Accuro for the whole year as a reminder of when submissions need to be made.
There is no need to wait until just before a cut-off date to make submissions. Submissions can be made at any time and as many times as required in a billing period. For large office, submitting daily or two/three times a week can aid to the smooth running of the office.
The cut-off dates are displayed in both the Office Calendar and the Provider Calendar.
To view cut-off dates:
 on the Accuro Navigation bar.
Note: To make cut-off dates to be visible on the hard copy of a calendar, add them to the calendar as calendar notes. For more help on calendar notes please see Create a Calendar Note.
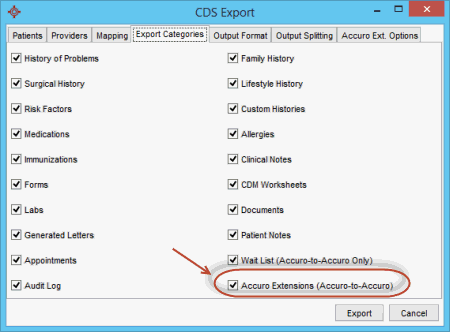
If the file you are exporting is going to be imported into another Accuro system then it is essential that the Accuro Extension checkbox is selected. To correctly export from one Accuro system and import into another, follow the procedures below:
To Export a File
 and specify output file location.
To Import a File