Ophthalmology
If your clinic has ophthalmology enabled then you will have access to some features not available to all clients. This section contains additional information on the extra features that your clinic has enabled.
EMR:
On the Encounter Notes tab there are additional sections in the medical history (the lilac bands at the right-hand side of the window (see below).
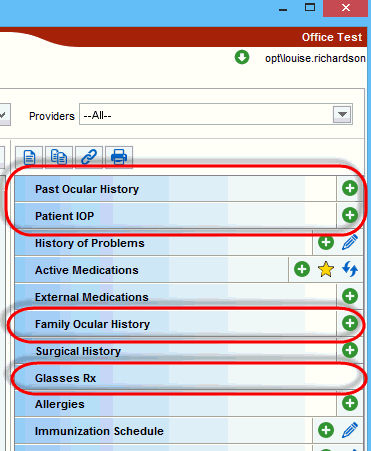
Past Ocular History: Record patient's ocular history.
Patient IOP: Record patient's intraocular pressure.
Family Ocular History: Record any family ocular history.
Glasses Rx: Record client's glasses prescription.
Medications:
For clinics with the ophthalmology module enabled there are additional fields on prescriptions to allow Provider's to specify left eye (OS), right eye (OD), both eyes (OU) or not applicable (N/A). this is done on the dosage window.

Generate a Glasses Rx
Note: The refractive exam form and the glasses prescription are not customizable.
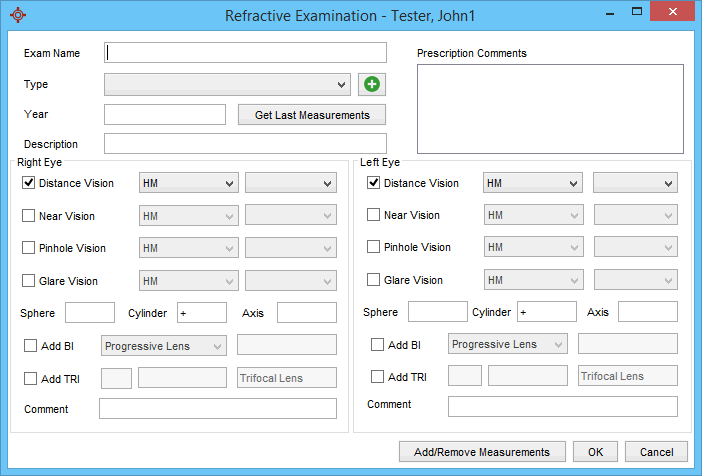
To generate a glasses prescription the refractive exam note must be completed in encounter notes and the the prescription generated. To do this follow the procedure below:
- Click the EMR button
 on the Accuro Navigation bar and click the Encounter Notes tab.
- Click the in the Clinical Notes section and select Refractive Exam form from the list displayed (it is displayed in the Notes dropdown section).
- Complete the form and click OK to save.
- Right-click on the saved refractive exam note in Encounter Notes and select Generate Glasses Rx.
- Click Print to generate a paper copy of the glasses prescription.
Note: If a prescription has already been created and saved it can also be printed prom the Ocular History tab (EMR > Ocular History tab > click Print Rx)
Enable Eye Options for Prescription Dosages
- Press and release the Alt key, type User Preferences in the search field and select from the list displayed.
- Click the Display button down the left-hand side of the User Preferences window.
- Click the EMR Workflow tab.
- Click to select the checkbox next to Show Eye Option for Prescription Dosages.
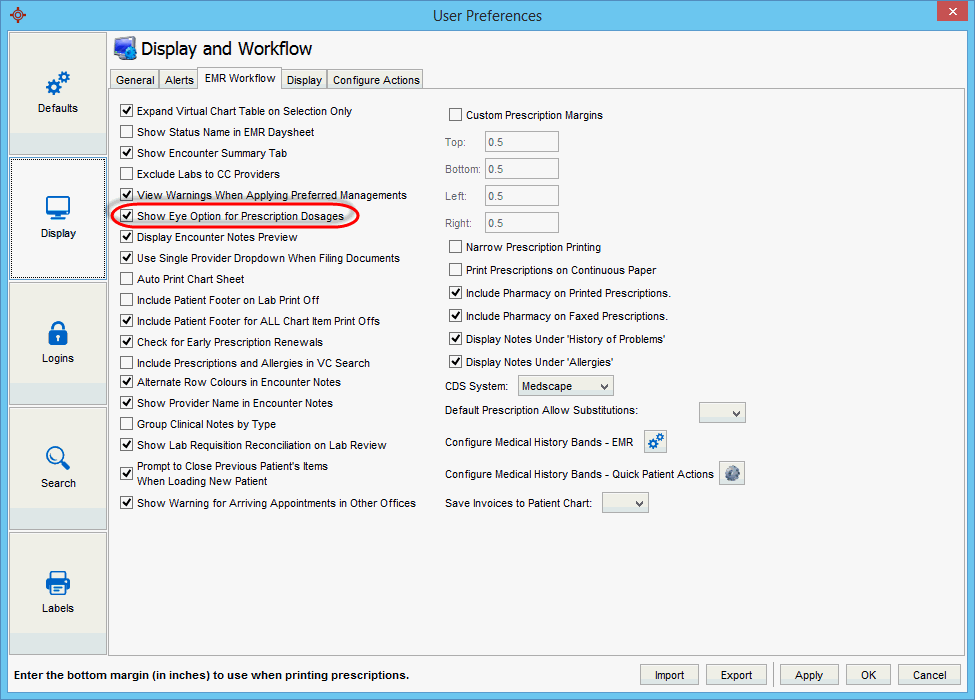
- Click Apply and OK to save the changes.
Add Past Ocular History
- Click the EMR button
 on the Accuro Navigation bar and click the Encounter Notes tab.
- Click the Add button
 on the Past Ocular History lilac ribbon. The Past Ocular History window is displayed.
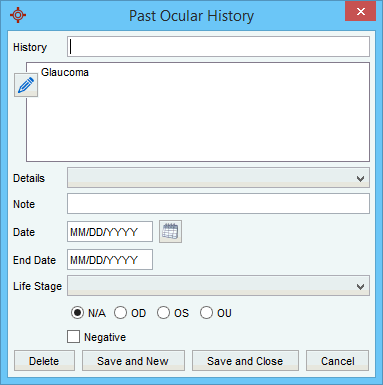
- Click the
 and select the Details from the list displayed.
- Double-click the Date field and select a date from the calendar displayed. Alternatively click the date icon to the right of this field to insert today's date.
- Double-click the End Date field and select a date from the calendar displayed.
- Click the
 and select the Life Stage from the list displayed.
- Select the appropriate radio button for left eye (OS), right eye (OD), both eyes (OU) or not applicable (N/A).
- Select the Negative checkbox, if applicable.
- Click Save and New to add another history item or Save and Close if no more items need adding.
Add Intraocular Pressure
- Click the EMR button
 on the Accuro Navigation bar and click the Encounter Notes tab.
- Click the Add button
 on the Patient IOP lilac ribbon. The Intraocular Pressure window is displayed.
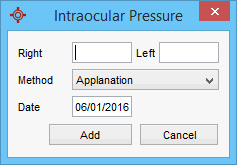
- Type in the pressures for the Right and Left eyes.
- Click
 and select the Method of measurement from the list displayed.
- The Date defaults to today's date. To select an alternative date, double-click the Date field and select from the calendar displayed.
- Click Add to add this information to the patient's record.
Add Family Ocular History
- Click the EMR button
 on the Accuro Navigation bar and click the Encounter Notes tab.
- Click the Add button
 on the Past Ocular History lilac ribbon. The Family Ocular History window is displayed.
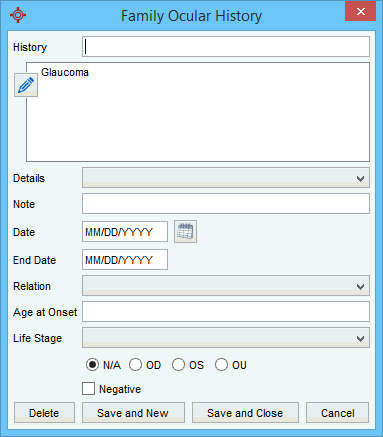
- Click the
 and select the Details from the list displayed.
- Type a note, if required.
- Double-click the Date field and select a date from the calendar displayed. Alternatively click the date icon to the right of this field to insert today's date.
- Double-click the End Date field and select a date from the calendar displayed.
- Click the
 and select the Relation from the list displayed.
- Type in the Age of Onset.
- Click the
 and select the Life Stage from the list displayed.
- Select the appropriate radio button for left eye (OS), right eye (OD), both eyes (OU) or not applicable (N/A).
- Select the Negative checkbox, if applicable.
- Click Save and New to add another history item or Save and Close if no more items need adding.


