Manitoba Data Extract
Setting up and generating your EMR data extract
Set up instructions
Contact Optimed Client Services to request the Manitoba Data Extract functionality be turned on – the CDM module. Once this is completed you will see the Chronic Conditions tab in the EMR – Encounter Notes section as well as an additional Medical History band called Primary Care Quality Indicators.
Accuro will ensure that all 7 extract files required are generated even if there is no data (ie: no chronic disease management data). Note that all 7 files are generated whether you have the Accuro CDM module turned on or not. It is recommended that you have the CDM module turned on in order begin collecting data for the extract on a go forward basis.
Data Mapping
Data mapping, in the context of this document, is a one-time configuration exercise done to enable the flow of data from one area of Accuro into another. When completed, data mapping will significantly reduce, and potentially eliminate, duplicate entry, thereby speeding up the data collection process. Furthermore, once configured, your EMR will leverage a number of primary care alerts and reminders based on commonly accepted standards of care for prevention and chronic disease management. These primary care indicators also serve as a basis for CDM tariffs available to Manitoba physicians.
Data mapping is optional but strongly recommended in order for Accuro to auto-populate indicators based on information added/received into the EMR. In addition to the benefits of decision support functionality brought on by this mapping exercise, your clinic will be able to improve the quality of their data contained in the extract over time with the long term opportunity of replacing your current CDM Forms that support billing tariffs along with your data extract.
There are two types of mapping: Condition Diagnosis and CDM. Explanation of these is best done by example.
Configure Condition Diagnosis Maps (MB)
Example for Condition Diagnosis:
If a Condition Diagnosis Map is set up for Diabetes, and a diagnosis of Diabetes is added to a patient, the diabetic worksheet will automatically be added to the Primary Care Quality Indicators Medical History band.
To configure Condition Diagnosis Maps:
- Press and release the Alt key, click Configuration and select Configure Condition Diagnosis Mapping.
- Select a condition from the Condition field dropdown list.
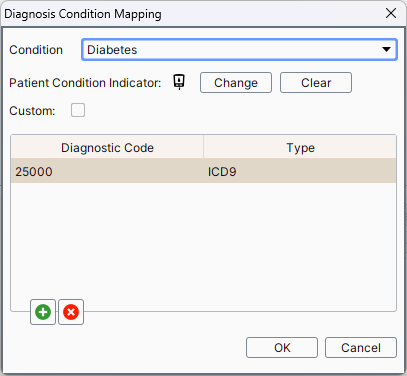
- In the patient's EMR (Encounter Notes) use the green plus button to add in all of the diagnosis codes you want to associate with this condition. Once complete click OK. The worksheet will now appear in the Primary Care Quality Indicators Medical History band each time these diagnosis codes are added to a patient such as in the History of Problems Medical History band.

- Repeat steps 2 and 3 for all desired conditions.
Configure CDM Mapping (MB)
Example for CDM Mapping:
If CDM Mapping is set up for the indicator "Date of last obesity screening", the appropriate CDM worksheet will update the date automatically as soon as a weight is entered into the physical history section.
To configure CDM Mapping:
- Press and release the Alt key, click Configuration and select Configure CDM Mapping.
- Select a worksheet from the Form dropdown list. A list of applicable indicators are displayed.
Indicators with a plus sign to the left already have built-in mapping by Accuro.
Indicators without a plus sign require you to complete the mapping and it is recommended that all indicators be mapped. - Select an indicator that requires mapping (or linking).
- Click the green plus button.
- Select the item in the system that should auto-populate the indicator in the worksheet (for all patients from now on throughout the entire system).
Note: This is a global setting that applies to the entire clinic.
Indicators may be mapped or linked to one or more of:- Lab Tests
- Lab Results
- Vaccines
- Medical History Band items (including custom bands if created).
- Documents Type
- Form
- Form Category
- Letter Type
- Childhood Immunization Group
- Clinical Notes
- Click Select then OK to complete the mapping.
- Repeat steps 3 through 5 for all unmapped indicators for each worksheet.
CDM Worksheets in Accuro – User Guide (MB)
CDM Worksheets are an important tool in Accuro in order to standardize the collection of data on patients in a primary care setting. The data collected in the CDM worksheets will be used in the Manitoba Primary Care Data Extract. Clinics must call Optimed Client Services to have this module turned on. If you have contacted Optimed regarding readiness for your data extract, this module should already be enabled.
Usage Instructions – CDM Worksheets
The CDM worksheets are meant to capture information on a patient for each visit or encounter. The worksheets can be opened from the EMR, filled out, and saved on the chart.
The CDM Worksheets are different than the CDM Forms. CDM Forms are used to support the CDM Billing whereas CDM Worksheets are associated with the Primary Care Quality Indicators. These CDM Worksheets auto-populate with lab values and other EMR data as configured in your CDM Data Mapping. CDM Worksheets have predetermined indicators and built-in alerts when each indicator is due. These alerts can assist you in providing comprehensive chronic disease management for your patients, and can help you ensure each of the services required in order to claim a CDM tariff has been performed within the appropriate timeframe.
To use CDM Worksheets on a patient, first load the patient in the EMR > Encounter Notes section.
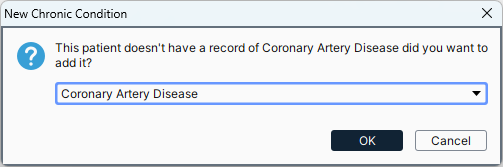
- From the Primary Care Quality Indicators band in the Medical History bands on the right, double click on a worksheet. If there is no worksheet for the chronic disease, use the green plus button within the Primary Care Quality Indicators band to add a new CDM Worksheet. Note: If this patient does not have the accompanying diagnosis listed in their History of Problems list, Accuro will give you the option to add it now.
- Click the OK button to add the condition diagnosis or Cancel to continue without adding the condition.
- Once the worksheet is open, select or enter the values in the worksheet. Remember that once you have done the mapping, newly entered values will automatically populate into the worksheets by clicking the Select Recent Values button.
Sample Diabetes Worksheet with overdue indicators:
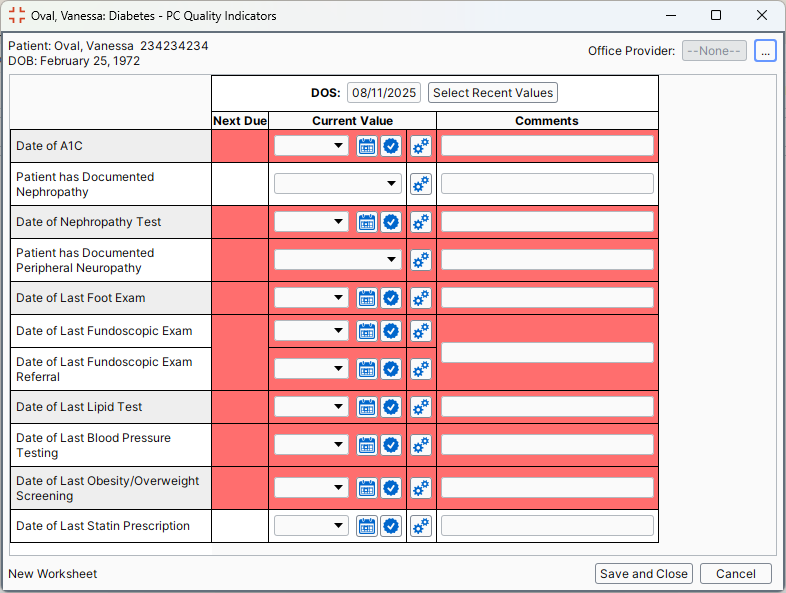
- Red items mean the value is overdue based on the last time the worksheet item was completed. Yellow items mean the value is soon to be overdue.
- For Date entries, the calendar button allows date selection and the green checkmark button puts in today’s date.
- Ensure the proper Provider is selected in the top right.
- Once all items are entered or updated, click Save.
Note: Once a worksheet is saved it lives in the Clinical Notes area and in the Virtual Chart (F4) similar to a form.
How to Run the Data Extract (MB)
- You must have Administrator access to generate the extract.
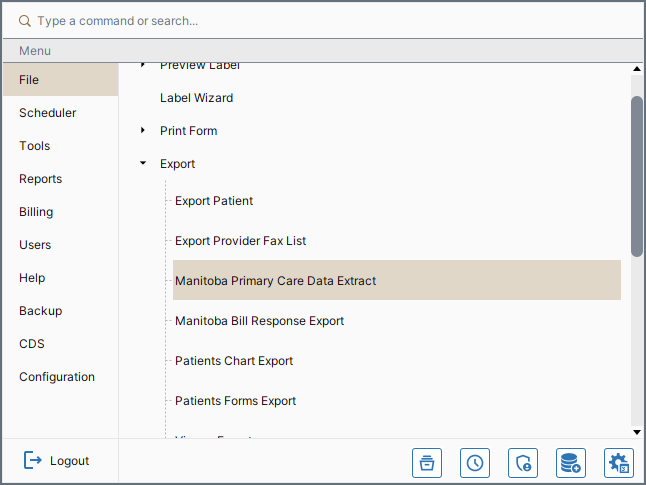
- Click File > Export > Manitoba Primary Care Data Extract
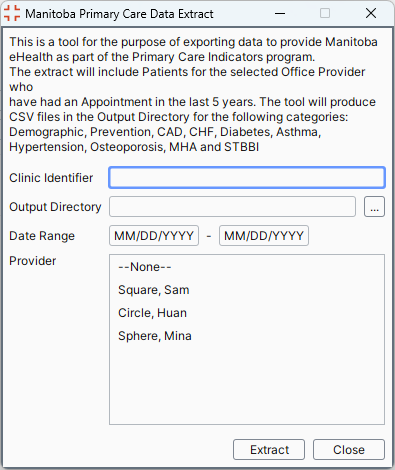
- In the Extract window:
- Enter the four-digit Clinic Identifier. This ID will be provided to you by Manitoba eHealth during your technical set-up. Your CSR can also provide you with this ID.
- Select the output directory (e.g.: C:/cloverleaf/csc4.4/client/couriers/tmp/data/in). Manitoba eHealth will provide you information for the appropriate directory to use
- during your technical set-up and we recommend clinics use this default permanently.
- Date Range: Please leave this blank. The extract is configured to pull data from all patients seen within the last 5 years.
- Provider: Select the providers to export by holding down the CTRL key and clicking their names. Please select "—None—" as the extract will also include patients without an office Provider selected. To include all providers, click CTRL-A. In this example, patients associated with Loretta Ford will be excluded.
Note: For the EMR Adoption Program, only clinicians who have signed the ISA should be included in the extract. It is the clinic’s responsibility to filter appropriately.
How to Send the Extract to Manitoba eHealth (MB)
Now that you know how to generate your extract, Manitoba eHealth will be reaching out to clinics across the province to arrange the transportation or submission of the files. Your EMR Adoption Program Clinic Service Representative (CSR) will be in touch with you to initiate the process. If you have any questions, call the PCIS Office at 204-926-3482.
Manitoba eHealth Contact Information
Phone: (204) 926-9000 (during regular office hours)
Fax: (204) 926-9190
Mail: 300-355 Portage Avenue
Winnipeg, Manitoba
R3B 0J6
Accuro EMR Manitoba Data Extract (MB)
Accuro is configured to generate an extract from your EMR that can be provided to Manitoba Health as part of their Primary Care Indicators Program. This guide explains what the extract contains and how to generate the data extract.
What is contained in the extract
The data extract produces 7 "CSV" files. In order to have your extract accepted at Manitoba Health, it must contact all 7 files with these exact file names.
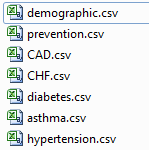
Demographic File
This file contains a list of all patients in your system with a date of last visit in the last 5 years. Any patients without an appointment in the last 5 years will not be included in the extract.
It includes demographics on the patient and the patient’s office physician, but does not include the patient names. This demographic information will be the basis for validation of the file. The minimum acceptance criteria is having 85% of the following demographic data complete in the submission: DOB, gender, PHIN and date of last visit.
In the demographics file, the Active indicator will be turned on for any patients with a status in Accuro of "Active".
Prevention File
Once Client Services turns on the CDM Manitoba Module that prepares you to submit your extract, all of your patients will automatically have a prevention worksheet initiated. The only prerequisite is that all of the minimum information (e.g. PHIN, birthdate, etc.) must exist in the patient’s record. This worksheet will be accessible from the Primary Care Quality Indicators band in the Medical History bands. Once the worksheet is opened and data is entered into it, the worksheet will also appear in the Clinical Notes area of the Encounter Notes section and the Virtual Chart.
CAD, CHF, Diabetes, Asthma, Hypertension Files
These files extract information from their respective CDM Worksheets. Once a worksheet is filled out on a patient, that data will be picked up the next time an extract is run. If you are not using CDM Worksheets, these files will not contain any information.
Tips and Tricks for Manitoba CDM
Tip #1: Generate a List of Patients that may qualify for the new Tariff
- Click Reports and select Alerts (Query Builder).
Click the Download button at bottom of screen.
 - Search for Manitoba CDM. Download the query.
Check out the rules in the query and change it as you need. It basically looks to make sure you have seen the patient in last 12 months and have billed or recorded one of the 5 problems using basic ICD9 coding. You will likely need to modify or add to the list of codes if you use other diagnosis codes. You could also expand the query to look at other chart information. You could remove the appointment in last 12 months rule. Modify this as much as you like. The intention here is to run this to get a list of patients that you could recall. - Run the Query, print.
Tip #2: Make a billing rule
To prevent accidental billing of the new codes more than once per year, make a billing rule.
- Click Billing and select Billing Rules.
- Click the Add button
 .
. - Select Billed "Within Date Range".
- ‘enter one of the codes’, billed 1 time within 365 days of ‘enter same code again’.
- Click OK.
- Repeat for all 5 codes.
Steps: (Advanced Users)
- Go in to Form Editor
- Select form for editing
- Right click on the text box that you want as a lab value (ie: Weight), and choose Edit
- Click the green plus under the left side of the screen
- On the right side (top), select "Query" from the list
- Underneath will appear another selection list. Choose "Lab Result"
(or "Lab Result Date" if you are looking to have the date) - Pick the test and result (ie: Physical History, Weight)
- Save (button on left side) ß important step
- Press OK to the screen
- Repeat this for each part of each form that you need a lab result auto-filled in to
[ie: Lab Results: weight, height, BP, and associated Lab Result Dates for each]
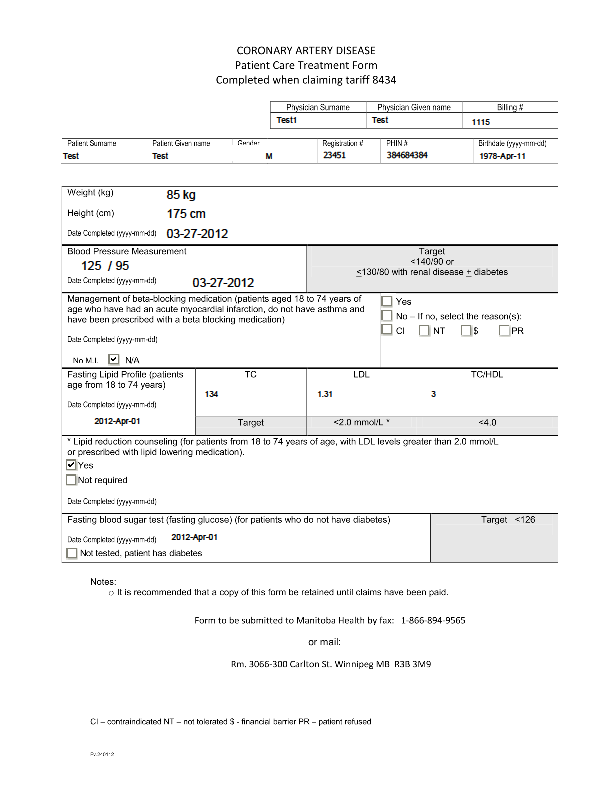
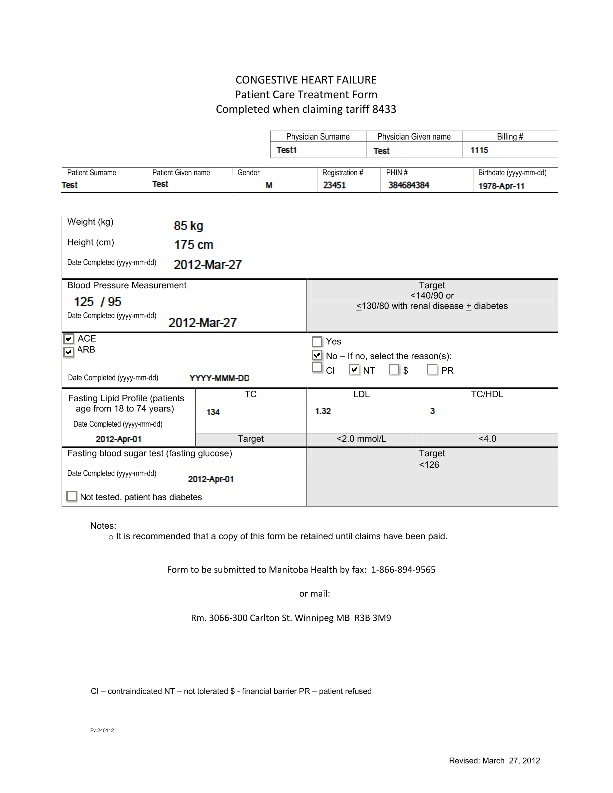
Sample Printouts Below