Configure Actions Tab
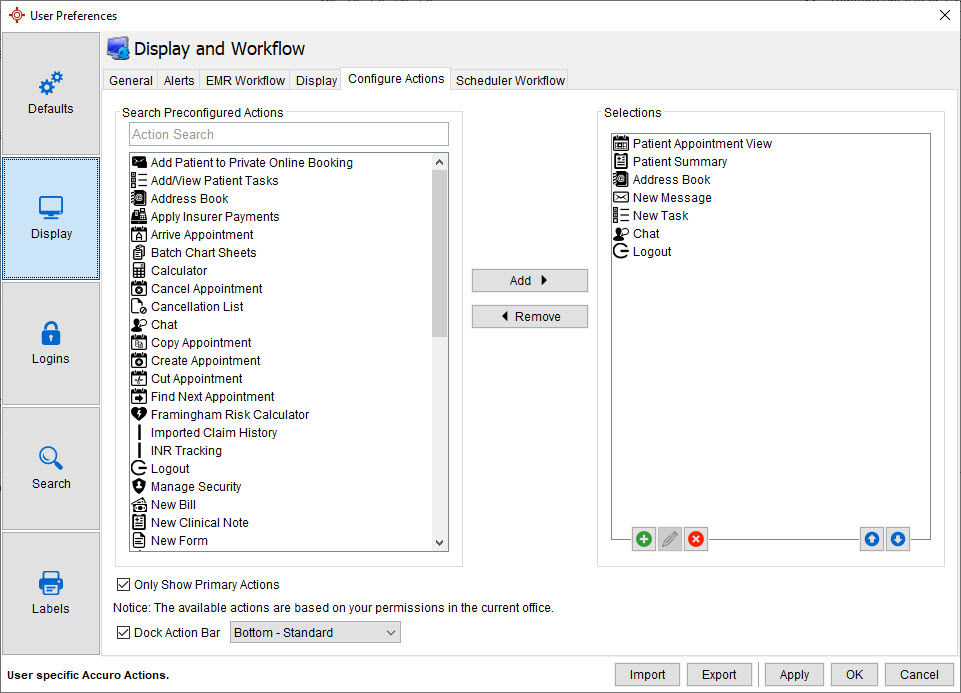
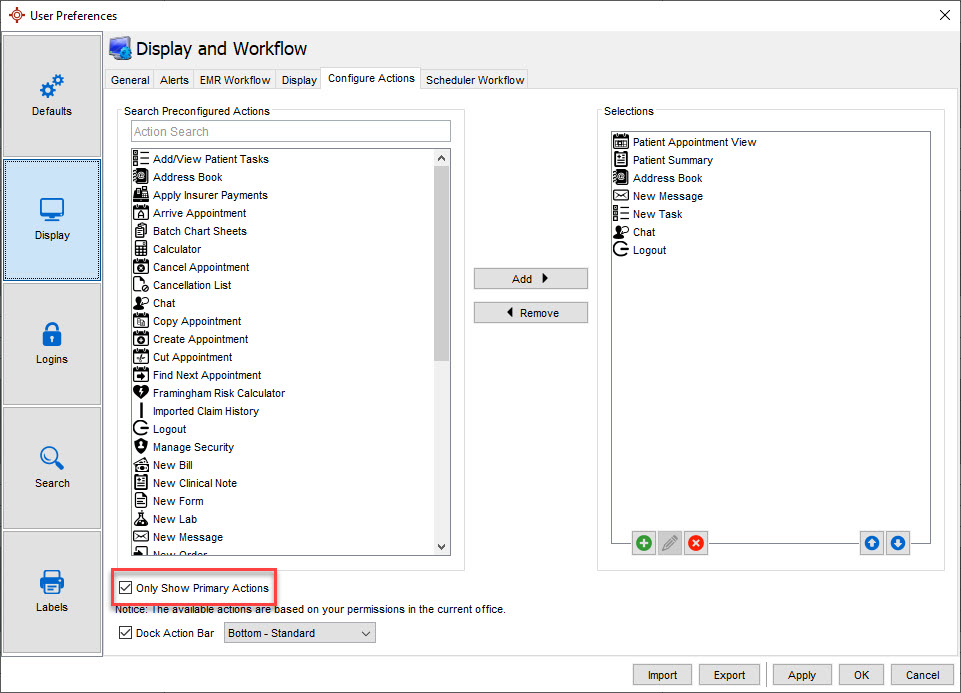
The configure Actions tab is where you choose the actions you want displayed on the Action bar in the Start menu. Some actions are displayed be default but users can add or remove items as required. All the items displayed in the Search Pre configured Actions section can be selected and moved to the selections side of the window. All items displayed in Selections are displayed on the Action bar which can be docked in the Start menu.
 See Administration - Core on Accuro Learning Academy (ALA) for additional help on this topic! See Accuro Learning Academy for access.
Custom actions can be added for: Labs, Forms and Letters.
This section is accessible though the Accuro Start Menu > File > User Preferences > Display > Configure Actions tab.
In this area of Accuro users can also select if they want the Action bar docked or not and if so where to dock it. The options available for docking are:
- Bottom - Large with Name
- Bottom - Standard
- Bottom - Small
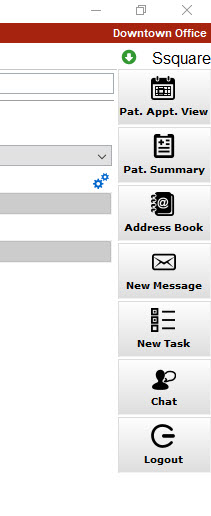
- Right - Large with Name
- Right - Standard
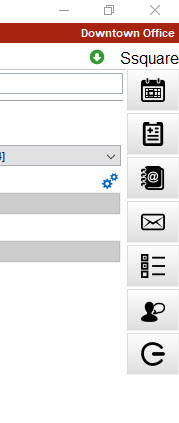
- Right - Small
Accessing the Configure Actions tab in Accuro
- Navigate through the Accuro Start Menu > File > User Preferences
- In the new window select the Display Tab followed by the Configure Actions sub-tab
Set up the Action Bar
- Access the Configure Actions area of Accuro. The Configure Actions tab is displayed.
The default items that are displayed on the docked Action bar are in the Selections area of the window.
Note: If the Action bar is not docked the selections are not displayed.
- Select actions in the left of the pane and use the Add
 button to move them onto your Action bar. Use the Up
  and Down
  arrow buttons in the Selections section to change the order of items displayed on the Action bar. To remove items already on the Action bar, select the item and click the Remove
  button.
- Click Apply and OK to save your changes.
Docking the Action Bar
The Action bar that is displayed in the Accuro start menu, can also be docked to your Main Accuro window. This means that the actions you have chosen to put on the bar are visible even when the Start menu isn't.
- Access the Configure Actions area of Accuro. The Configure Actions tab is displayed.
- Click the Dock Action Bar checkbox.

- Select one of the options available in the dropdown.
Note: If the Dock Action bar is not selected, then the dropdown is not available.
- Click Apply and OK to save your changes.
- Bottom - Large with Name
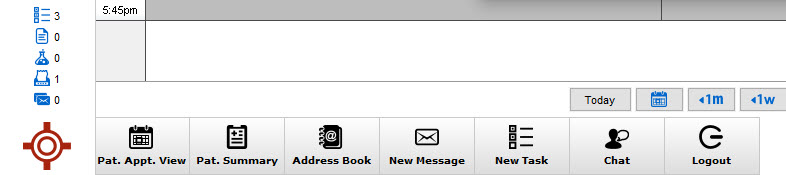
- Bottom - Standard

- Bottom - Small

- Right - Large with Name
- Right - Standard

-
Right - Small
Show Primary Actions
If the list of items that can be added to the Action bar is more than you want to search through, there is an option to display only primary Actions.
To view only primary items, follow the procedure below:
- Access the Configure Actions area of Accuro. The Configure Actions tab is displayed.
- Click the Only Show Primary Actions checkbox.
Add and Remove Preconfigured Actions
- Access the Configure Actions area of Accuro. The Configure Actions tab is displayed.
- Select actions in the left of the pane and use the Add button to move them onto your Action bar. Use the Up and Down arrow buttons in the Selections section to change the order of items displayed on the Action bar.
- To remove items already on the Action bar, select the item and click the Remove button.
- Click Apply and OK to save your changes.
Custom Actions
To allow users more flexibility with what is displayed on the Action Bar, users can add some custom action items. The items that can be added fall into the following categories:
- Custom Form Action
- Custom Lab Action
- Custom Letter Action
This feature is designed to allow forms, labs and letters that are used multiple times daily to be available without having to go looking for them each time.
Add a Custom Action Item
- Access the Configure Actions area of Accuro. The Configure Actions tab is displayed.
- In the Selections section click the green Add
 button. The Custom Action window is displayed.
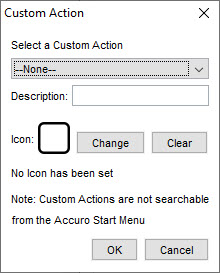
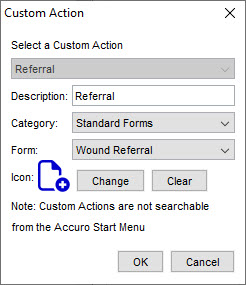
- Click the dropdown at the top of the window and select from Custom Form Action, Custom Lab Action or Custom Letter Action. For this example Custom Form Action was selected.
- Type in a Description.
- Select the Category of the form.
- Click the Form dropdown and select from the list displayed.
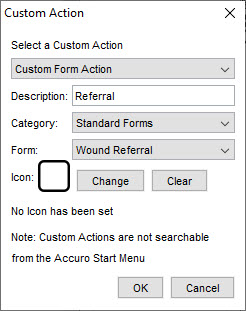
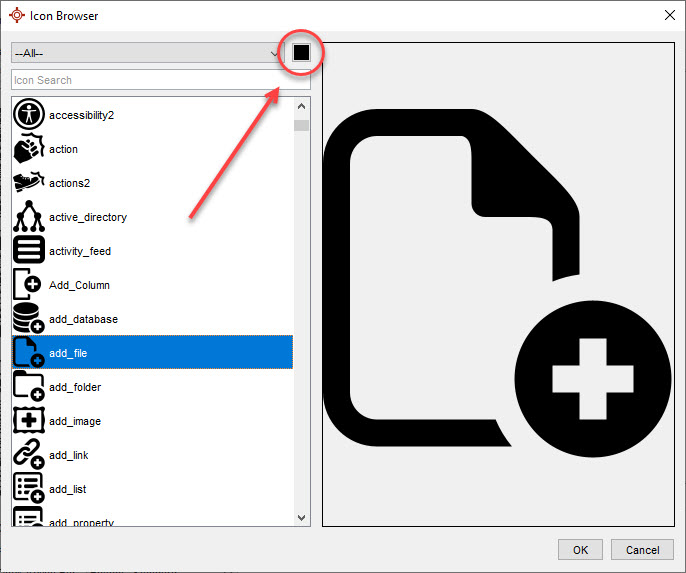
- To change the icon click the Change button.
Note: The first time you select the change icon it may take a few seconds to load up the icons available. The Icon Browser is displayed.
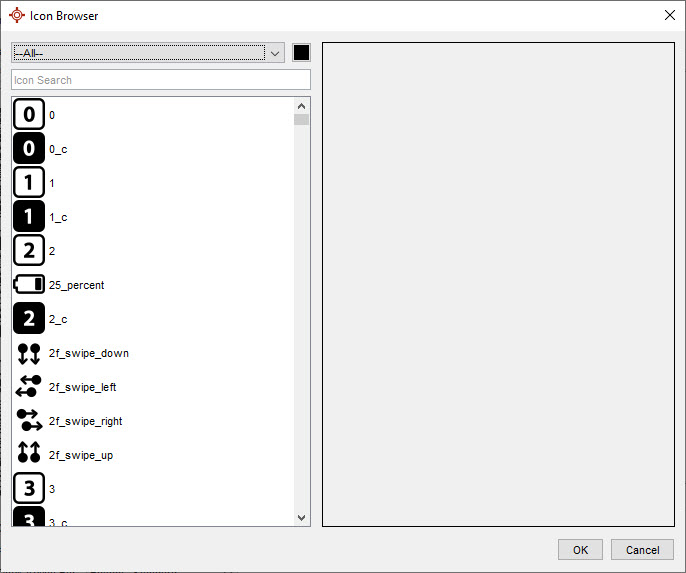
- Browse the icons and select the one to be displayed on the Action bar.
- To change the color of the icon click the color box and select from the palette displayed.
- Click OK to save your choice. The icon is now displayed in the Custom Action window. To clear an icon, if it is no longer required, click the Clear
 button.
- Click OK to add your custom action.
Note: Even though you have added a custom action to your Action bar, these custom actions cannot be searched for in the Start menu.
- To view this item in the already docked Action bar, click Apply. If you have any more items to add, continue adding, otherwise click OK to close the window.

Edit a Custom Action Item
- Access the Configure Actions area of Accuro. The Configure Actions tab is displayed.
- In the Selections section click to select the item you want to change and click the Edit
 button. The Custom Action window is displayed.
- Type in a new Description, if applicable.
- Select a new Category for the form, if required.
- Click the Form dropdown and select an alternative, if needed.
- To change the icon click the Change button. Browse the icons and select the one to be displayed on the Action bar.
- To make the icon a new color, click the color box and select from the palette displayed.
- Click OK to save your changes.
- To refresh the already docked Action bar, click Apply. If you have any more items to edit continue to do so, otherwise click OK to close the window.

Delete a Custom Action Item
- Access the Configure Actions area of Accuro. The Configure Actions tab is displayed.
- In the Selections section click to select the item you want to delete and click the red Delete
 button. The item you selected is deleted.