BC Pediatric Society Medical Transfer Summary Form 

Note: The contents of this User Guide are for functionality that requires specialized configuration, setup and training by our Implementations Team before it works with Accuro. This additional functionality may be subject to added fees along with your subscription cost. If you are interested in finding out more about this or any product, please contact your Accuro Account Manager or our Client Services team at 1 (866) 729-8889 or accuro@qhrtech.com.

Background

Successful transition from paediatric-centred to adult-oriented healthcare positively influences health outcomes for youth with chronic illness [Prestidge et al.  Pediatr Nephrol (2012)].

The BC Pediatric Society (BCPS) conducted province-wide consultations and pilot of draft transition/transfer resources with BC Community Pediatricians and other physicians in 2016-2017.  The Medical Transfer Summary (MTS) is one of four tools and resources supporting transfer practice that grew out of those consultations. 

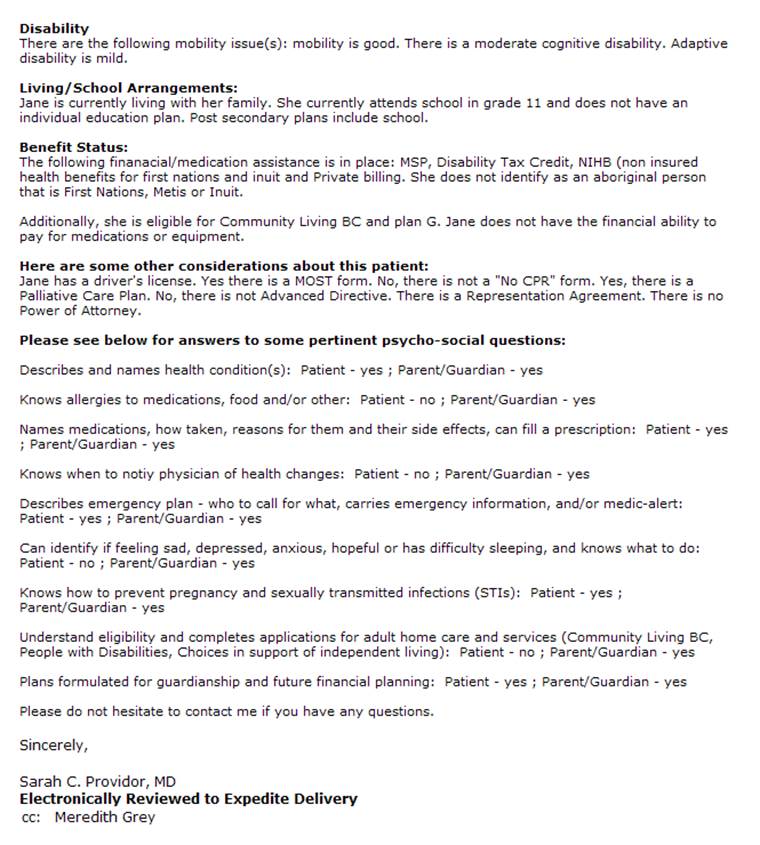
This comprehensive form provides an efficient way for community pediatricians to summarize information or use the MTS as a checklist.

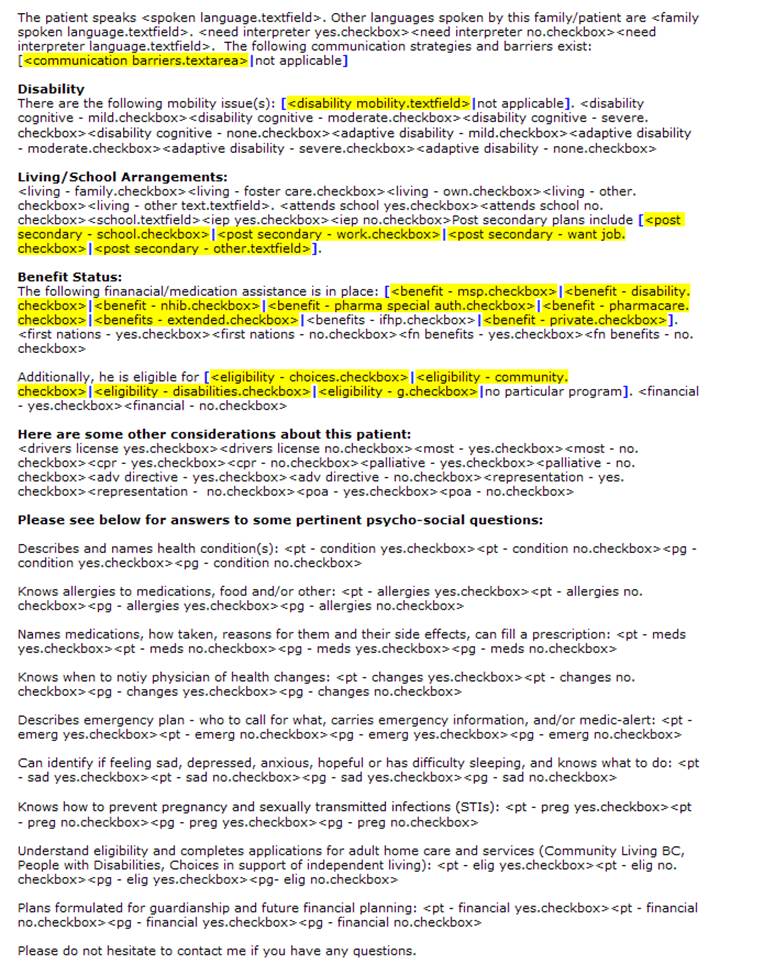
This form is organized so that the medical information community pediatricians would usually summarize is on page 1 and 2, and the 3rd page contains an array of additional information that can be completed by the pediatrician or by the patient/family in discussion with the pediatrician.

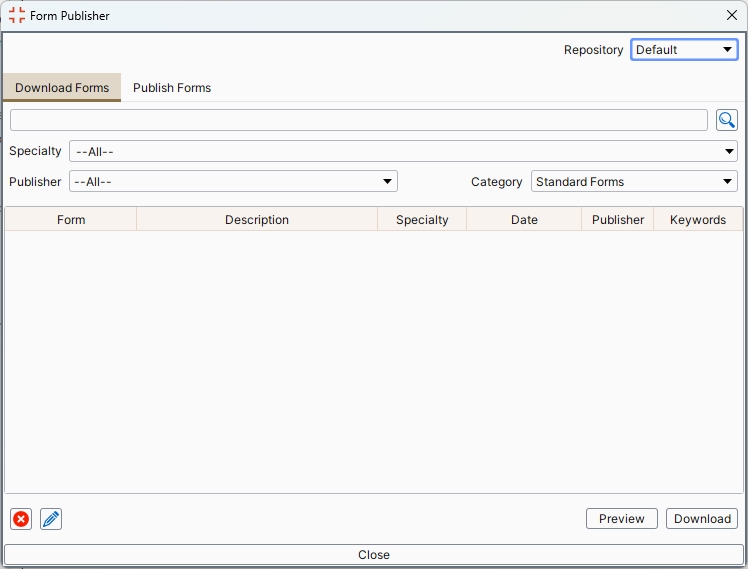
The form is published in the Accuro Form Repository for use of all Accuro EMR users, the following guide contains instructions for configuring the EMR to use the medical transfer summary form more efficiently.

One-time Accuro Configuration

The Pediatrician has 2 options for sending the medical transfer summary:

Option 1 – sending a completed form only
Option 2 – sending a generated letter

Before completing the Medical Transfer Summary Form and potentially generating the Transfer letter, the EMR must first be configured. These configuration steps are only completed once, in order to save the required documentation templates in the EMR.

For both option 1 and option 2, the ‘Medical Transfer Summary Form’ must be downloaded. If proceeding with option 2, additional templates and introductions need to be configured to complete the letter.

Downloading the Form

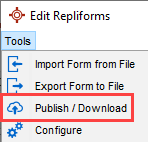
From the Accuro Start menu, open the Form Editor.

  1. Press ‘Alt’ on your keyboard
  2. Type “Form Editor” and tap enter
  3. Select the “Tools” menu in the upper left of the Form Editor and choose ‘Publish / Download’
  4. Search for “Medical Transfer Summary”
  5. Select the “BC Peds – Medical Transfer Summary Form” and press ‘Download’
  6. The form is now available for use in the EMR.

Required EMR fields

The transfer form and letter have been created to pull information already recorded in the patient’s chart. Please ensure the information in the patient chart has been updated including the following Medical History Bands BEFORE opening the transfer form.

Opening the transfer form for a patient

Once the Transfer Form and Letter Template are saved into the EMR and the required medical history bands are confirmed and up to date. The transfer form can be generated for a patient.

  1. From the EMR, Encounter Notes tab, select a patient by typing into the search field in the upper left hand corner
  2. In the electronic drawer (notes/forms dropdown) in the middle of the screen, find the Medical Transfer Form
  3. Open the form, and fill in all fields that do not pre-populate.
    1. To navigate between the text entry fields, press and hold the CTRL key on the keyboard and tap TAB. This moves the cursor between the text entry fields in sequential order.
  4. Note: there are 3 pages to the form. Fill in information on all 3 pages if applicable.
    It may not be possible to fill in the final page without the help of the family, this final page can be printed and filled in by hand, then either:
  5. Press OK, to save the form to the patient’s chart

Option 1 - Sending the form

Now that the form is filled in and saved, it can be faxed to any recipient in the address book.

  1. Select the ‘fax’ button at the bottom of the page
  2. Click the add button in the “Fax Recipients” window.
  3. Search the address book for the desired recipient(s) and press ‘Select’ to add them.
  4. Enter a cover sheet message if desired.
  5. Select the paper clip button to include any additional chart items with the form.
  6. Press ‘Send’ to send the form to all recipients.

Option 2 – Generating and sending a completed letter

Additional configuration items need to be complete if sending a generated letter instead of the completed transfer form first to ensure the correct template and letter introduction are available in the EMR

One-time configuration - Creating the Letter Template

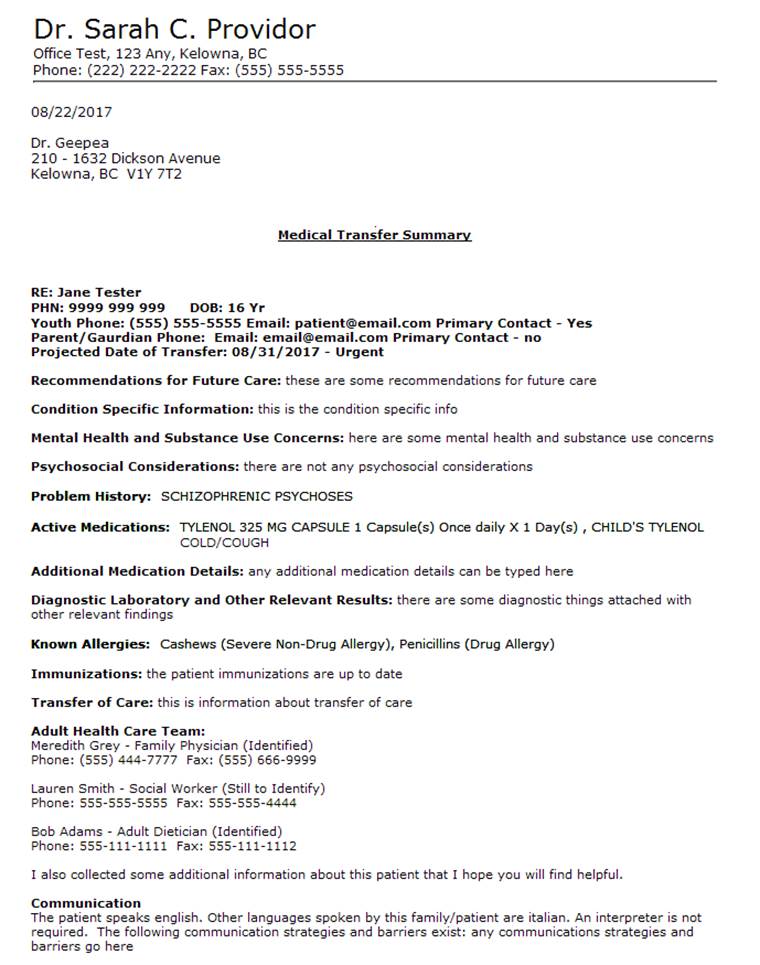
Unlike forms, letter templates cannot be downloaded from a central repository. The template will need to be copied and pasted into the Template Wizard in Accuro. The template creates a Clinical Note and becomes the body of the letter that is sent from Accuro. It will also pull relevant information that was entered onto the transfer form.

In an attempt to make it easier to copy and paste the letter template, the text for the template has been published into a form, so that the copy and paste can be done from within Accuro.

  1. First, Press ‘Alt’ on your keyboard
  2. Type “Form Editor” and tap enter
  3. Select the “Tools” menu in the upper left of the Form Editor and choose ‘Publish / Download’
  4. Search for “Medical Transfer”
  5. Select the “BC Peds – Transfer Letter Template” and press ‘Download’
  6. Open the form from the Form Editor by double clicking on it from the Standard Forms list
  7. Click the cursor into the text area on the form, then tap “CTRL + A” on your keyboard to select all
  8. Now tap “CTRL + C” on your keyboard to copy the text
  9. Close the Form Editor
  10. From the Accuro Start menu, open the Template Wizard.
  11. Press ‘Alt’ on your keyboard
  12. Type “Template Wizard” and tap enter
  13. Select the ‘New’ button in the bottom left hand corner of the Template Wizard
  14. Enter a name for the template, such as “Generic Transfer Letter”
  15. Click into the body of the template, and tap “CTRL + V” on your keyboard to paste the previously copied text
  16. Some formatting may be required. Such as bolding certain headings, and pre-selecting certain clickable lists.

    The final version of the template should look like this :


  17. Click save.

One-time configuration - Creating the Introduction for the Letter

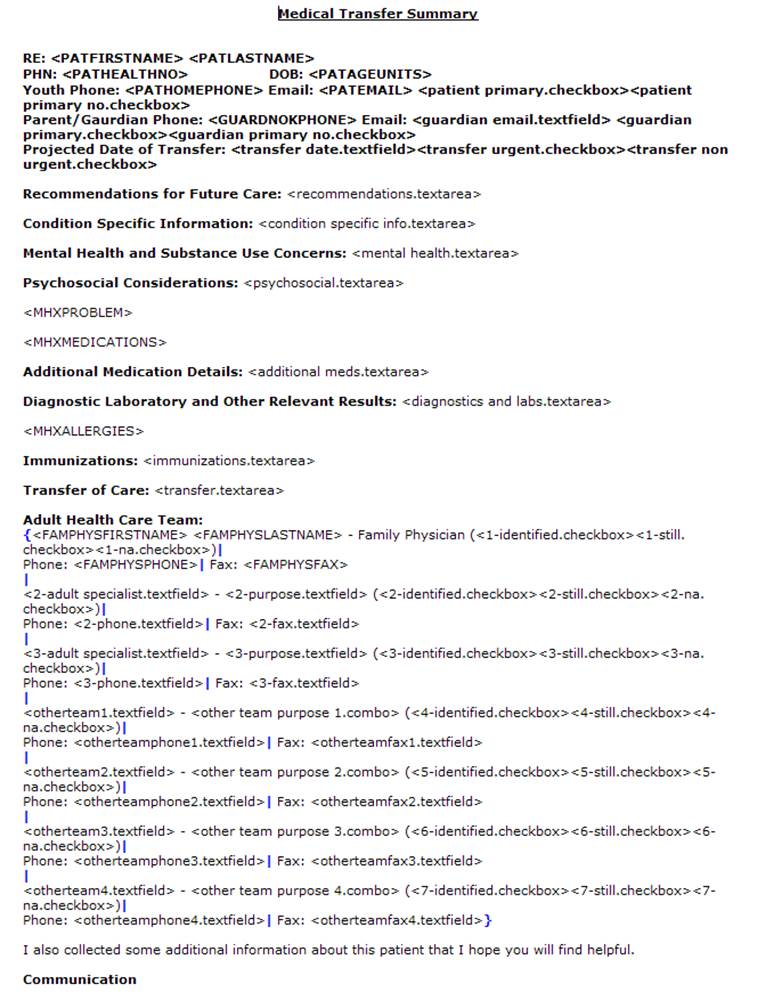
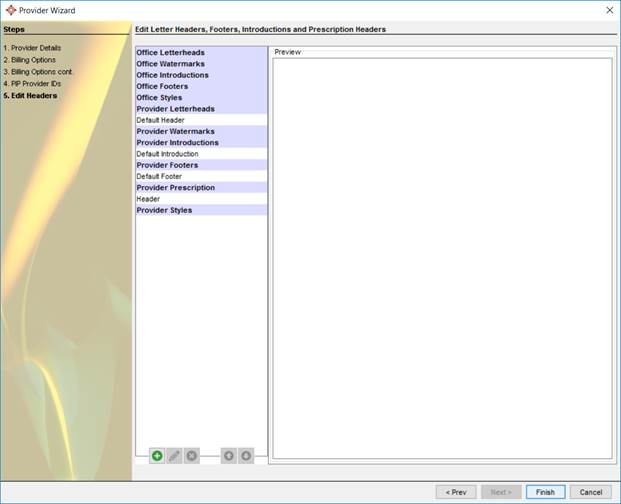
Accuro creates letters with 4 elements:

  1. Header – contains Provider information and clinic letterhead (if applicable)
  2. Introduction – contains the patient and recipient information
  3. Body – comes from the clinical note saved to the patient’s chart
  4. Footer – contains the Provider’s signature and any closing greetings

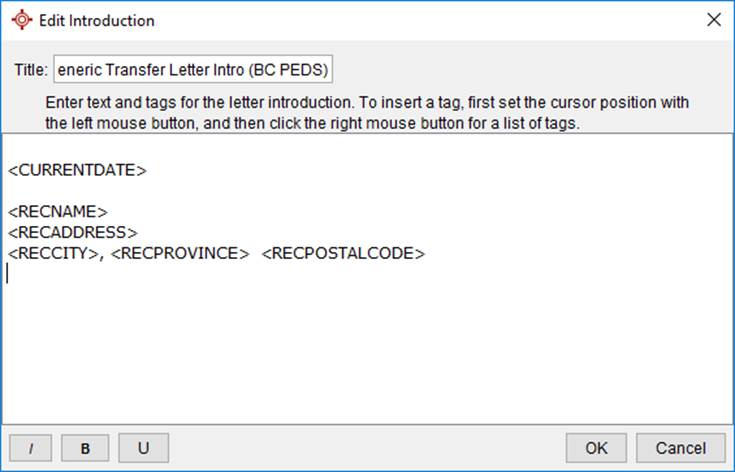
The introduction for this generic transfer letter needs to be in a specific format and will need to be created in Accuro.

It is recommended to create a new introduction specifically for this transfer letter so that no patient information is duplicated on the letter. Most patient information is populating from the letter template, and this introduction pulls the recipient information only. Even if you already have a default introduction for all letters in Accuro, please follow these steps.

  1. Press ‘F2’ on your keyboard to open the Provider Management screen
  2. Select the name of one Provider from the “Search Results” on the left
  3. Click the ‘Configure’ button along the bottom of the screen
  4. Now press ‘Next’ in the Provider Wizard window until the “Edit Letter Headers, Footers, Introductions and Prescription Headers” screen displays
  5. Press the ‘Add’ button
  6. A window appears asking you to choose the following:
    1. Level – Office or Provider: Select “Office”, then click ‘Next’
    2. Type – Letterhead, Introduction, Footer or Watermark: Select “Introduction, then click ‘Next’
    3. Method – Create New, Copy Existing or Create from Template: Select “Create New”, then click ‘Next’
    4. Choose Finish
  7. Enter a Title for the introduction, such as “Generic Transfer Letter Intro”
  8. Delete the text that automatically populates and copy and paste the following into the “Edit Introduction” window:


    ,
  9. Some formatting may be required. The final version of the introduction should look like this
    :
  10. Press ‘OK’ to save
  11. Then press ‘Finish’

Generating the letter from the transfer form

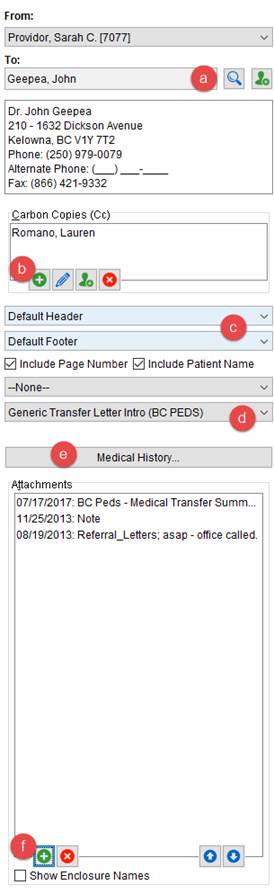
Now that the form is filled in and saved, the letter can be generated. To do this, first a clinical note must be opened.


  1. Right click on the Medical Transfer Form that was just saved to the patient’s chart
  2. Hover over “Generate Letter” and select the Generic Transfer Letter template that was created
  3. All information that is already in the patient’s chart, or that was entered onto the form will populate into the letter
  4. Read through the letter and select any clickable words that need to be selected and click the ‘Complete Selections’ button
  5. If applicable, click the ‘M -> F’ button to change any male pronouns to female
  6. Press the ‘Gen. Letter’ button
  7. The “Letter Generation” window opens, and the proper information along the left of the window needs to be selected:
    1. If not already populated, select the  to search the address book for the recipient. The Referring Physician is usually the default recipient for letters, but can be changed
    2. Enter any Carbon Copies by pressing the add button and searching the address book
    3. Ensure the correct header and footer (with signature) have been chosen
    4. The last dropdown determines the introduction, ensure the correct introduction has been chosen to include the information required
    5. If any medical history populates in the introduction area, click the ‘Medical History…’ button and de-select “All”.
    6. Use the Add button under “Attachments” to include any other chart items with this transfer letter including the original form.
  1. Make any final formatting edits to the letter before sending it to the new Physician


  1. The final copy of the letter should look something like this:

Sending the letter

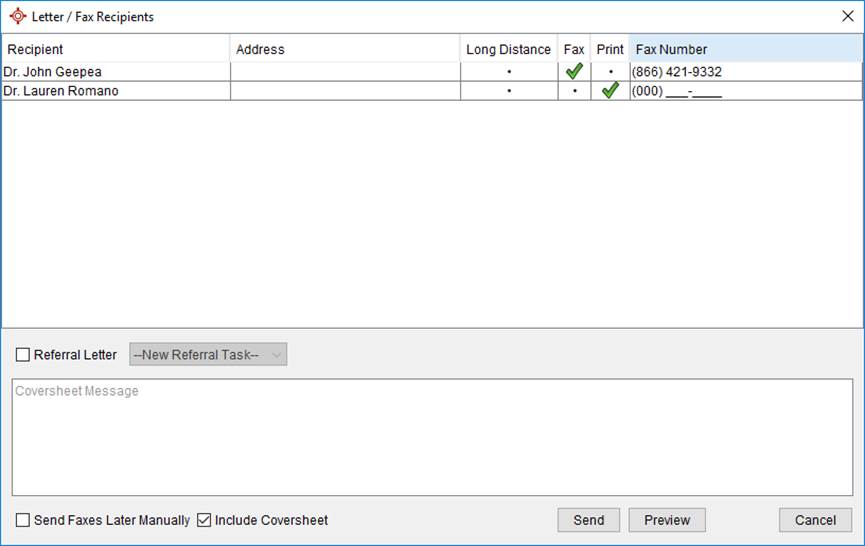
When the letter is complete, it is sent to all selected recipients.

To fax the letter:

  1. Choose the ‘Send Letter’ button at the bottom of the “Letter Generation” window to fax it to the selected recipients. The Letter/Fax Recipients window displays:
  2. Add any cover sheet messages, and press ‘Send’ when ready

Training and Support

QHR Technologies can provide your clinic with support and user training. User training may be subject to a fee.

Client Services
Phone: 866.729.8889
Email:
accuro@QHRTech.com

Training
Phone: 866.534.3627 ext 3568
Email: training@QHRTech.com