Hospital Reports Manager, HRM (ON)
A Clinic must be running Accuro®EMR version 2013.09 or later and have had the module enabled and configured by QHR Technologies.
Using the Hospital Reports Manager (ON)
Once the Hospital Reports Manager (HRM) module has been enabled the physicians have a new folder in their Labs inbox called Hospital Reports. This can be accessed by
- Clicking Home icon

- Open the Labs folder and select a Provider.
- Open the Hospital Reports folder
- If the patient already exists in Accuro (and has the same demographics as entered at the hospital) the reports are attached to the patient automatically.
- If the patient has not been matched, match the patient by selecting the
 button.
- Once Locate Patient is selected a window similar to above will display. In the upper left there is the Patient information that is pulling from the Hospital Report. In the bottom left a list of possibly matches already in Accuro, and on the upper right the currently selected patients demographics. If there is no existing possible match you can select the Add Patient button this then pulls in the available information from the hospital report.
- Matching of these hospital Reports is also done based on the Provider who it should be delivered to, however it is important to check the Unassigned folder to ensure that there are no labs that haven’t matched to a Provider.
- If any Reports are found that have not matched, they can be highlighted and the
 button can be pressed that will then bring up the following window allowing the appropriate Provider be selected.
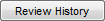
- The Hospital reposts will automatically save to the patient chart as well as be available for review in the Provider’s inbox. Once the Provider has seen the Report in their Lab inbox they can select the
 option which will remove the entry from view.
- If Review has been selected inadvertently,
 can be selected from within the Lab inbox.
- By selecting the date range and the Provider a list of all reviewed items will be displayed, if any need to be unreviewed they can be highlighted and the Unreview Selected button can be pressed.
- As items in the Reports are toggled between they will have the bolding of their titles removed. This usually indicates that the Report has been "read". To indicate that they are new and unread, right click > Mark as Unread.

- Notes can also be added to the individual reports. This can be done by clicking on Reports, scrolling to the bottom notes field and entering the note. The change will be saved automatically, including updating the record in the patient chart.

- If multiple versions of the same report have been received, there will be a clock like icon
 that will display to the right of the test name. Clicking on this icon will display previous versions of the same report. It is important to note that the order they are displayed is the order in which they were received.
- Reports will frequently have a letter to the right of the test name, this letter will be encompassed by brackets.
(S) – Signed
(P) – Preliminary
(F) – Final
(C) – Cancelled
- Additionally if the report is flagged with either signed or cancelled an icon will also appear in the Information (I) column of the virtual chart.
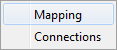
- Hospital Reports give the clinic the ability to change the way that new Incoming reports are displayed in the Chart and Inbox. This is done through Mappings. Mappings can be adjusted by a System Administrator by selecting Configuration > Hospital Reports > Mapping.
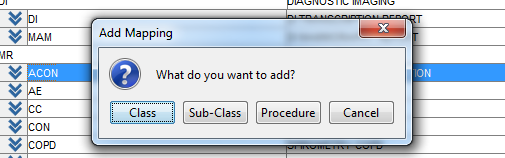
- Classes, sub classes, and procedures can then be added using the green plus
 at the lower left hand side while having a class or subclass selected. Subclasses and Procedures will be created under the selection.
- If there is no prior configuration for a class and/or subclass the report will display with the abbreviated tag name.
- * Note: If nothing is selected when the green plus is selected the only option will be add a new class.
- Additionally, descriptions can be edited as per a clinics preference simply by double clicking the description and making the desired changes. We recommend setting the descriptions to equivalent document types that may already exist in Accuro. Once the descriptions are changed they will only take effect on newly received documents.
- Separately configured facilities can also be added by selecting
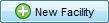 at the top.
- You are then presented with a screen asking for the facilities 4 digit number.
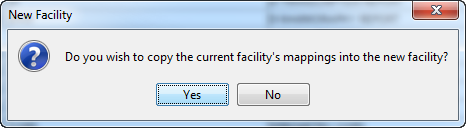
- Once OK is pressed Accuro will prompt if you want to copy the current facility’s mappings to the new facility.
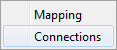
- If Labs ever have to be pulled manually outside of the preconfigured schedule this can be done from > Configuration > Hospital Reports > Connections.
- The Run Manual Download can then be pressed to immediately run a pickup of labs.
- *Note: No other settings should be changed and it could affect report delivery.
- To print a report you can single click it from the inbox to highlight. Then a "Print" option will appear in the upper right hand side of the bar between the inbox (top portion) and the Preview (bottom portion)

- Alternatively, if a report is opened up into its own window by double clicking, there will be a print button that appears at the bottom, centered.

- Once either of these print options are selected there will be a print window appear where you can select the printer you wish to use.
- Accuro also gives the clinic the option to customize a confidentiality statement that will be appended to the end of the report.
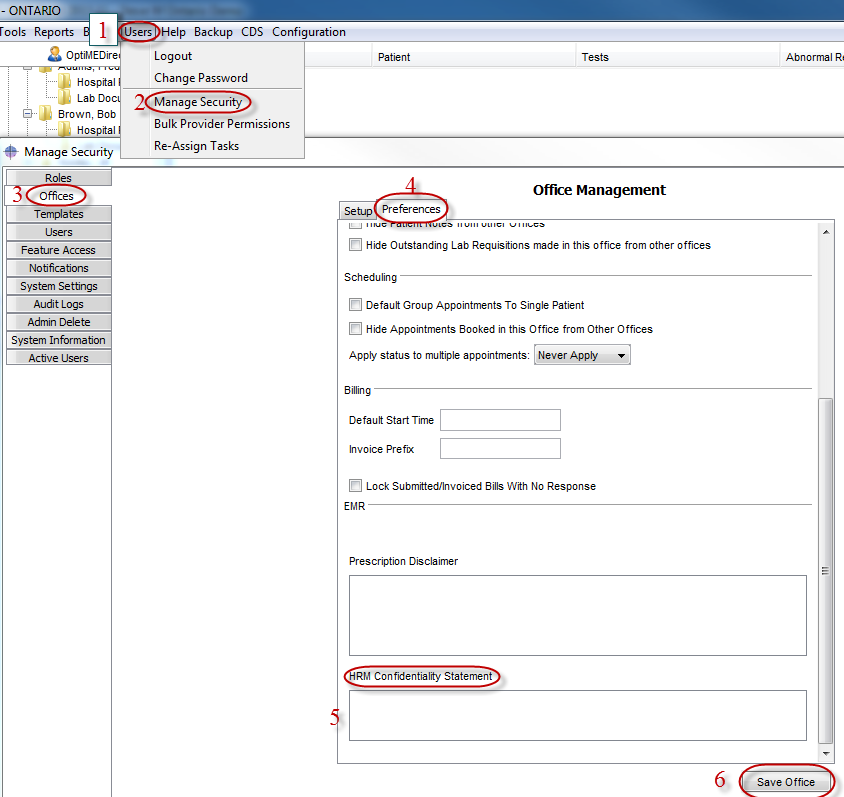
- To add a confidentiality statement you must be logged in as a System Administrator. You would then select the Users menu, at the top of the screen > Manage Security > Offices > Select Office > Select Preferences tab at the top. If you scroll to the bottom of this screen you will see a field where the statement can be entered. Once completed ensure that the office is saved before closing the window. Below is a screen shot outlining the steps.
- Categorizing the reports is usually done automatically, however if a report comes in without mappings or incorrect mappings these can be manually changed by opening the report from either the Labs inbox, under the home section, or by double clicking the report in the Virtual Chart.
- Once the report is open look for this button in the bottom right
 . Once selected a window will be displayed with both the Class and Sub Class including their descriptions.
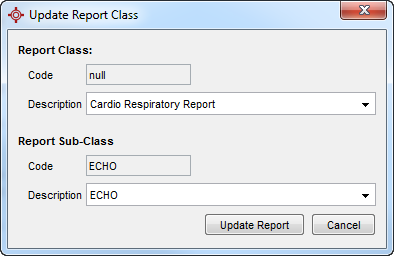
- The users now have the ability to select a new description from the dropdown or highlight and type in their own on a "one off" scenario.