Submission Manager
For each submission the submission date, the bills procedure code and who they were for (both by Provider and patient) are tracked. Records are stored prior to attempting submission. Once the submission is successful the status is updated from Incomplete to Complete. This information is located in the Submission Manager.
Users can now manually flag a submission as completed in the case where the submission makes it through but Teleplan fails to respond properly for Accuro.
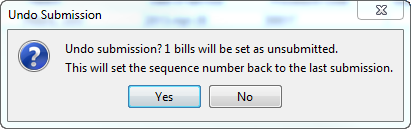
The undo and redo update the last sequence number. The only time the undo or redo adjusts the last sequence number is when the submission being managed is the most recent submission for the data center.
A manual adjustment of the last sequence number is now available through the BC submission manager. Adjusting the last sequence number only updates the last sequence number and does not un-submit all the bills.
Access the Submission Manager
- Click the Claims button
 on the Navigation bar.
- Click the Submission Manager button
 at the bottom-right of the window. The Submission Management window is displayed.
- Click the Sequence Number Manager tab.
- Type in the correct sequence number.
- Click the Update button.
Sequence Number Manager (BC)
- Click the Claims button on the Navigation bar.
- Click the Submission Manager button at the bottom-right of the window. The Submission Management window is displayed.
- Click the Sequence Number Manager tab.
- Type in the correct sequence number.
- Click the Update button.
Undo/Redo a Submission
- Click the Claims button on the Navigation bar.
- Click the Submission Manager button at the bottom-right of the window. The Submission Management window is displayed.
- Click the Submission Manager tab.
- Select the submission from the list displayed and select either Undo Submission or Redo Submission.
- A confirmation message is displayed, click Yes.
- Click the Update button.
Manually Flag a Submission as Complete (BC)
Manually flagging a submission as completed is intended to be used where the submission makes it through but Teleplan fails to respond properly for Accuro.
- Click the Claims button on the Navigation bar.
- Click the Submission Manager button at the bottom-right of the window. The Submission Management window is displayed.
- Click the Submission Manager tab.
- Click the Include Incomplete checkbox.
- Select the submission from the list displayed and select Redo Submission button.
- Click the Update button.
Viewing Previous Submissions (BC)
Previous submissions can be viewed using the submission report (Ctrl+R to access reports). Only new submissions will be tracked in the Submission Manager.
Unsubmitted Claims
Unsubmitted Claims includes all claims that have yet to be submitted from all dates of service for the Provider selected. All claims that are to be submitted electronically are displayed on this tab. Claims for private insurers are not displayed on the Unsubmitted Claims tab.
The Date Filter can be used to filter Claims for the Last 6 Months, Last 12 Months, or All Items.
Note: The default of this dropdown is the Last 9 Months and can be managed in the Preferences tab of Office Management (Accuro Start Menu > Users > Manage Security > Offices > Preferences tab under Billing).
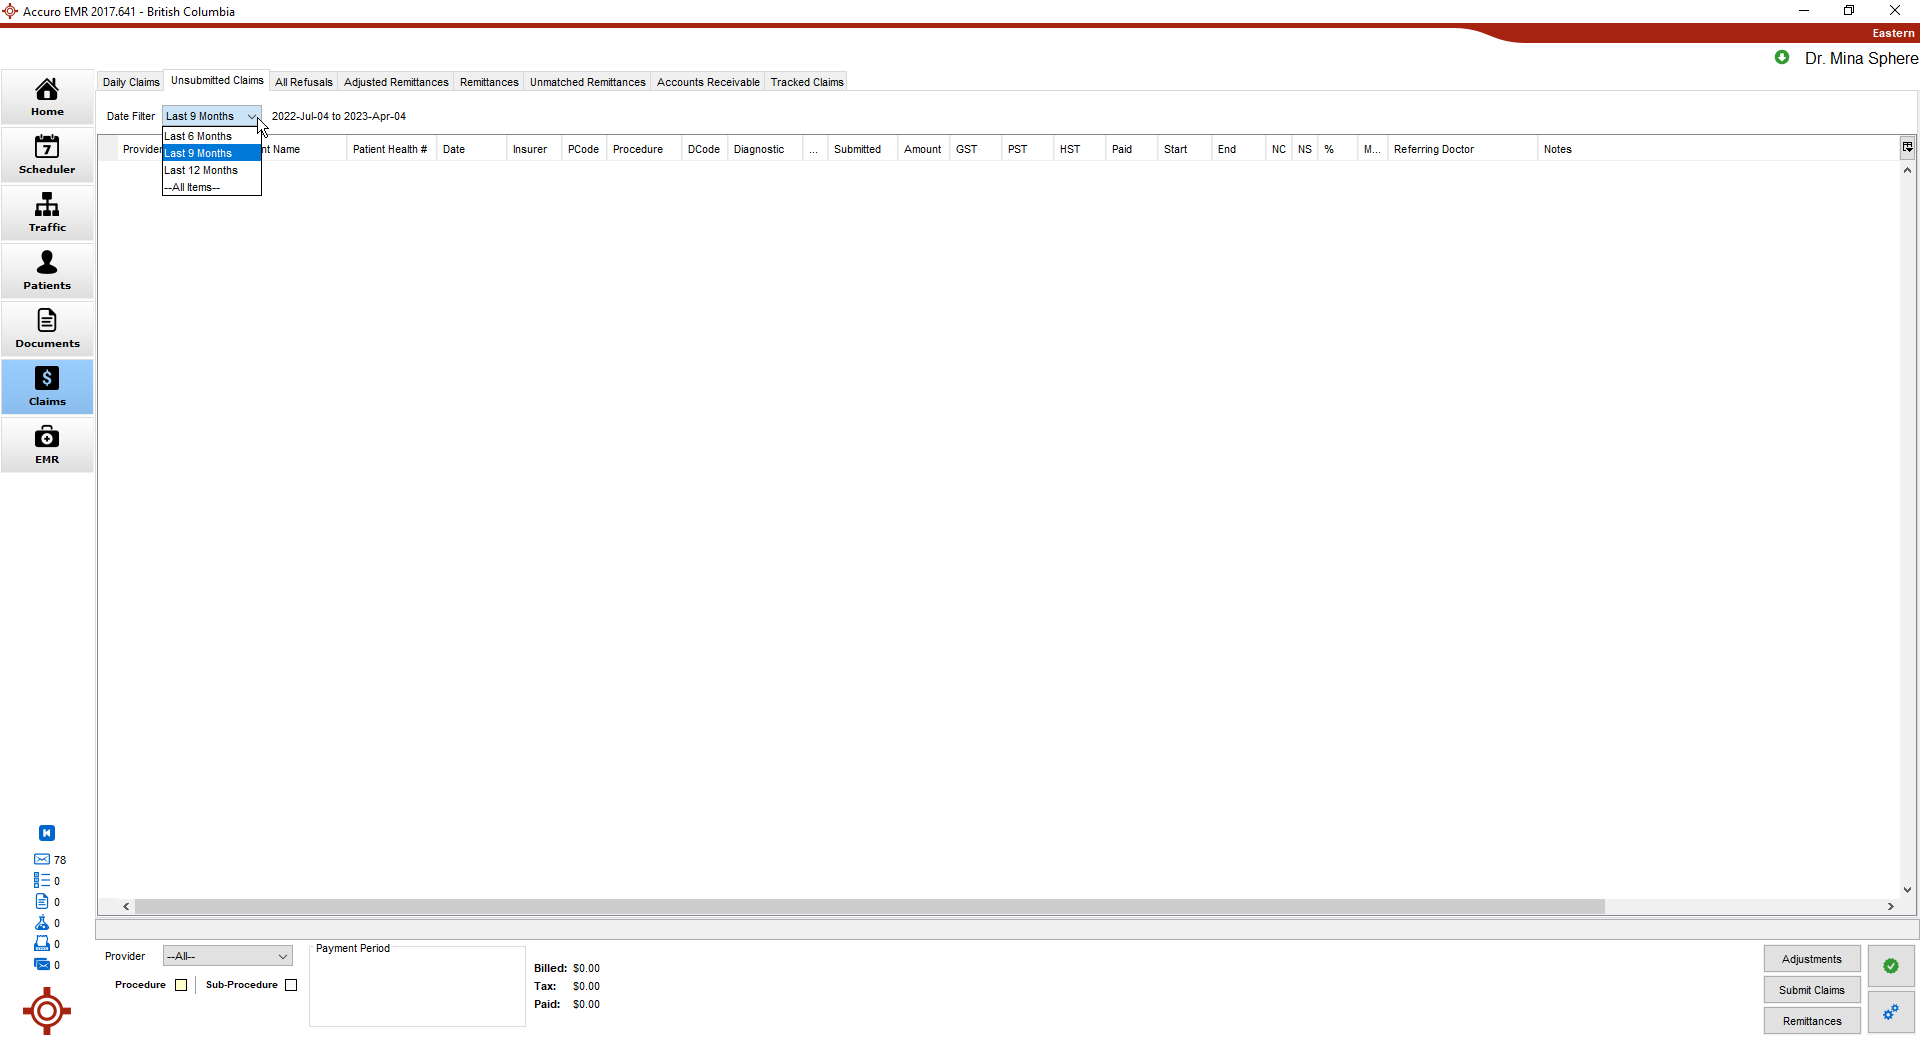
Some of the claims listed are complete and ready for submission. Other may be missing codes and other information. To see if any information is missing, click to highlight the claim. At the bottom of the unsubmitted Claims window a message is displayed, identifying missing information in the selected claim.

Completing the Claim Form (BC)
Note: All fields with a red dot " " in the top-left corner are mandatory and must be completed.
Complete the Claim Window
- If a claim has been opened from an appointment, the patient is already loaded. If you are creating a new bill from Daily Claims, you need to load a patient using the Search Tool.
- Check the Patient Details are correct. If any of the details are incorrect, correct the relevant information.
- Ensure the Date of Service and Provider in the Details section are correct.
- Click the Ellipses button
 to change or add a Ref From and Ref To, if required.
- Click
 and select an Insurer from the list displayed.
- Click the Add button
 to add a procedure and any necessary sub-procedures for the claim.
Add a Procedure
- Double-click the space below Procedure and type in a code or keyword.
- Select the procedure from the list displayed.
- Double-click the space below Diagnosis and type in a diagnosis code or keyword.
- Select the diagnosis from the list displayed.
- The other fields auto calculate based on the procedure and diagnosis codes selected.
- Click the No Charge, No Show and/or MVA checkboxes, as required.
Add a Sub-procedure
- Click the Add button to create a new procedure line.
- Follow the steps above for adding a procedure above.
- Complete the Claim Details.
- Click and select an Insurer from the list displayed.
Note: If you selected WCB or ICBC then the electronic claim form is available by clicking the Form button  . If any other insurer is selected, this button is greyed out
  .
.
- Click the Ellipses button to change or add a Ref From and Ref To, if required.
- Click and select a Location from the list displayed.
- Select a Start Time and End Time, if required (for hospital billing).
- Type in an Internal Note, if required. This is a note for your office and is not transmitted with the claim to the insurer.
- Type in an MSP Note, if required. This is a note transmitted with the claim to the insurer. Alternatively click the and select a note from the list already set up in your clinic.
- Click and select the Percentage from the list displayed.
- Click
 and select the Last Day of Visit from the list displayed, if applicable.
- Click and select the SSC from the list displayed.
- Type in the Facility name, if required.
- Click and select the Submit Code from the list displayed.
- Click to select the Resubmit and Paper Correspondence checkboxes, if applicable.
- Click Save to save your changes.
Completing the WCB Claim Form (BC)
If the insurer is WCB, a WCB Claim form should be completed. This form can be opened by clicking the Form button beside Insurer on the Claim Details window.
On the WCB Claim Form, all fields with a red dot are mandatory and must be completed.