DI/DSM Display Addendum to Accuro EMR User Guide (WRHA Only)
The Accuro®EMR user guide documentation contains the full explanation of the electronic labs and Diagnostic Imaging reports functionality. There are however some unique presentations of eHealth Manitoba DSM / DI results which are slightly different from the other electronic feeds which are explained below.
MB Changes Specific to DSM/DI Feeds
- DSM Lab Results
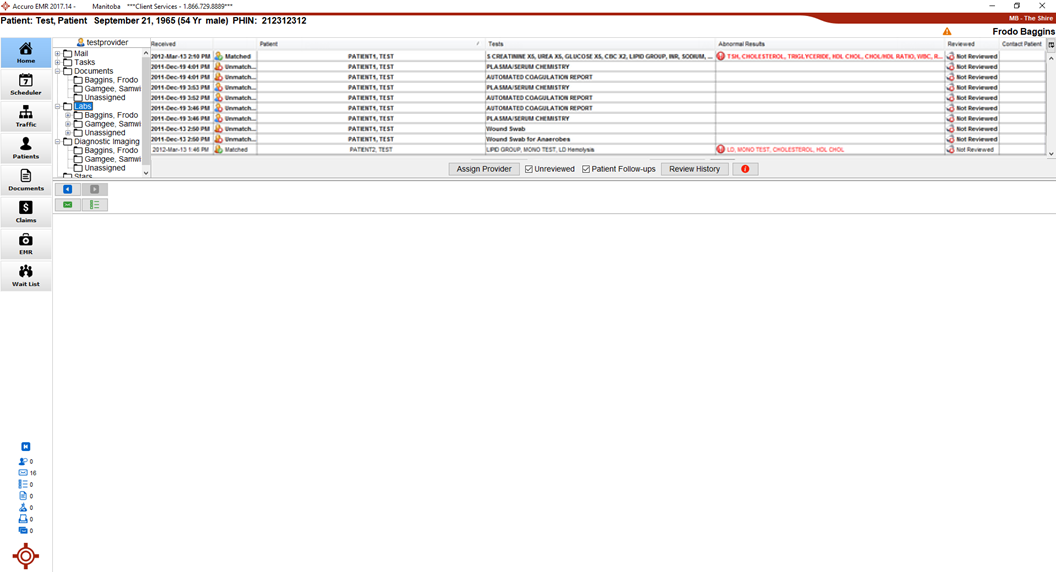
After the DSM lab feed has been enabled by Accuro technical support the results are presented in the Home Section under the Labs Category. All unreviewed lab results are contained in the main folder and each Provider specific labs are contained under their respective names as subfolders under the main heading. This functionality is exactly the same as described in the main Accuro®EMR user guide documentation.
For viewing labs in the patient virtual chart this can be filtered by selecting the Labs items type option in the folder pane.
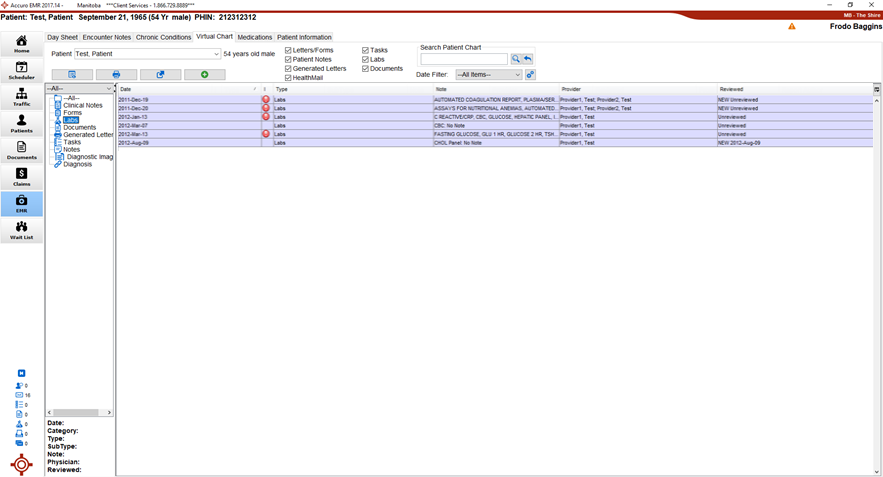
Drilling down on a specific lab result will open up a viewer window to view details.

- DI Diagnostic Imaging Results
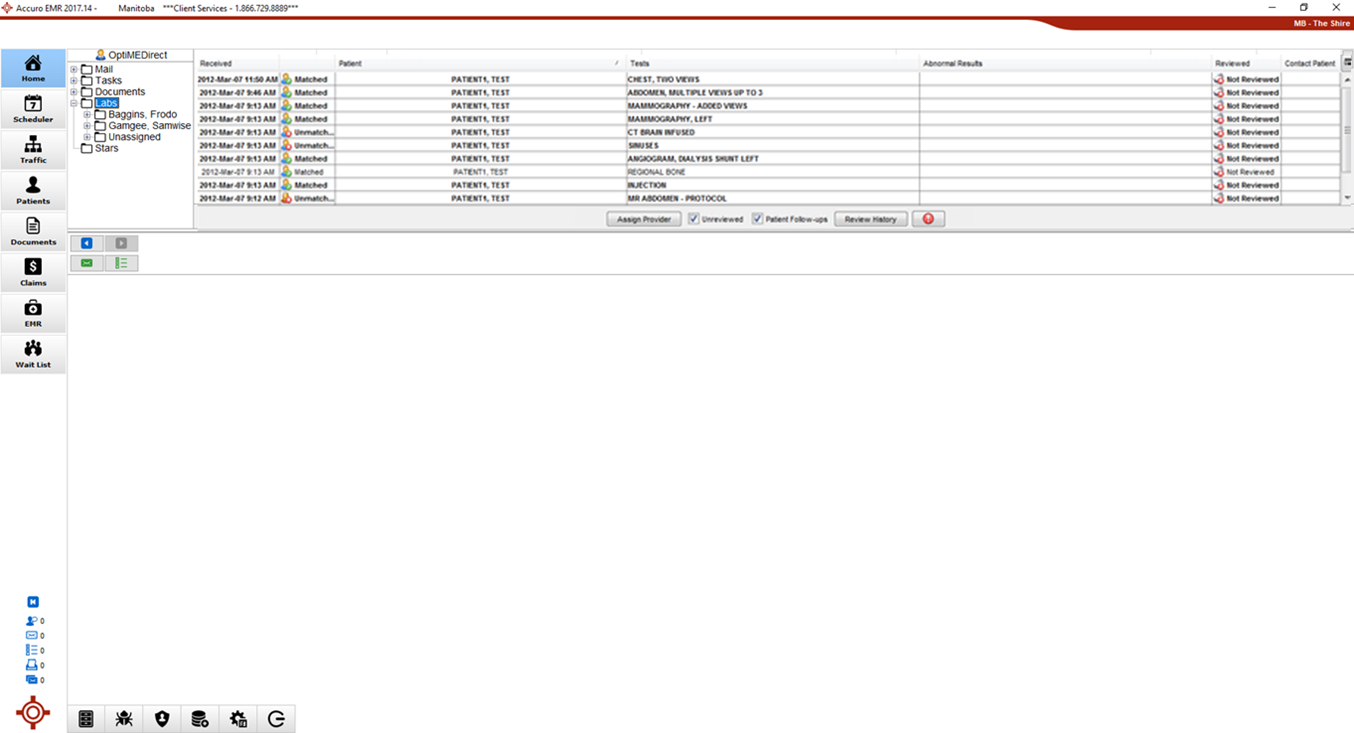
Once the DI lab feed has been enabled by Accuro technical support the results will be presented in the Home Section under the Diagnostic Imaging Category. The DI results will be populated to a separate Diagnostic Imaging folder much the same as labs in example 1. All unreviewed diagnostic imaging results will be contained in the main folder and each Provider specific DI reports will be contained under their respective names as subfolders under the main Diagnostic Imaging heading.
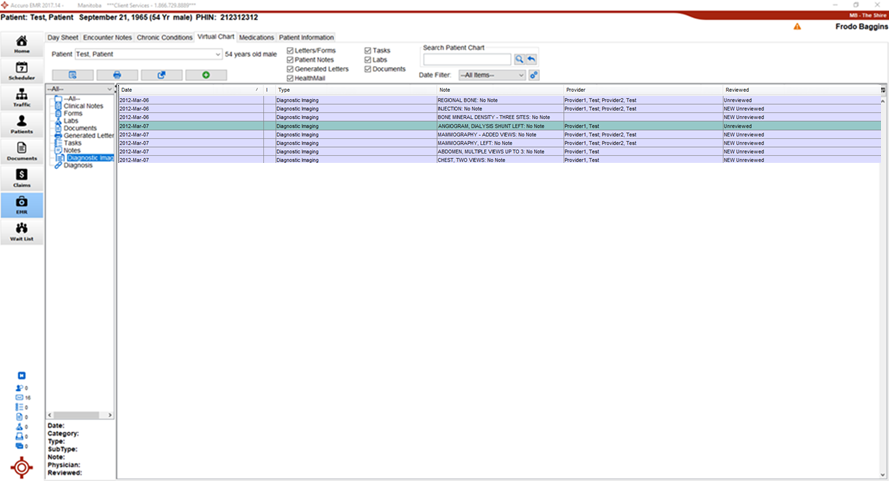
- For viewing of Diagnostic Imaging in the patient virtual chart this can be filtered by selecting the Diagnostic Imaging option in the folder pane.
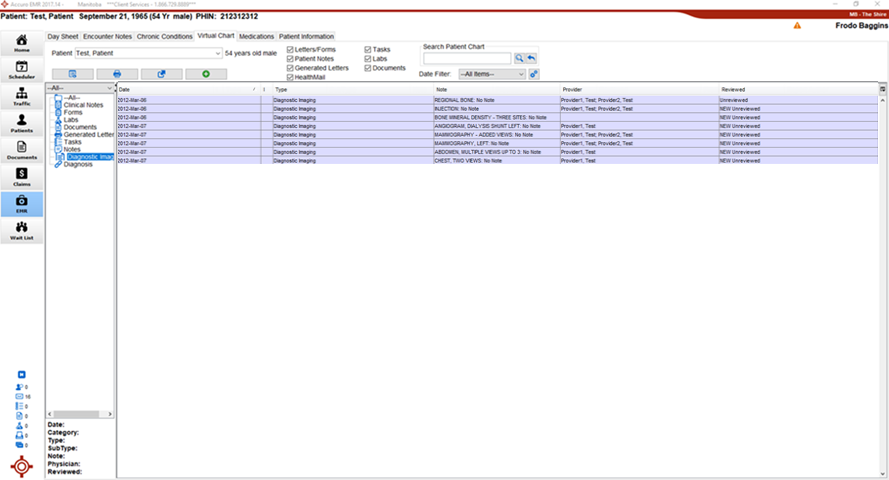
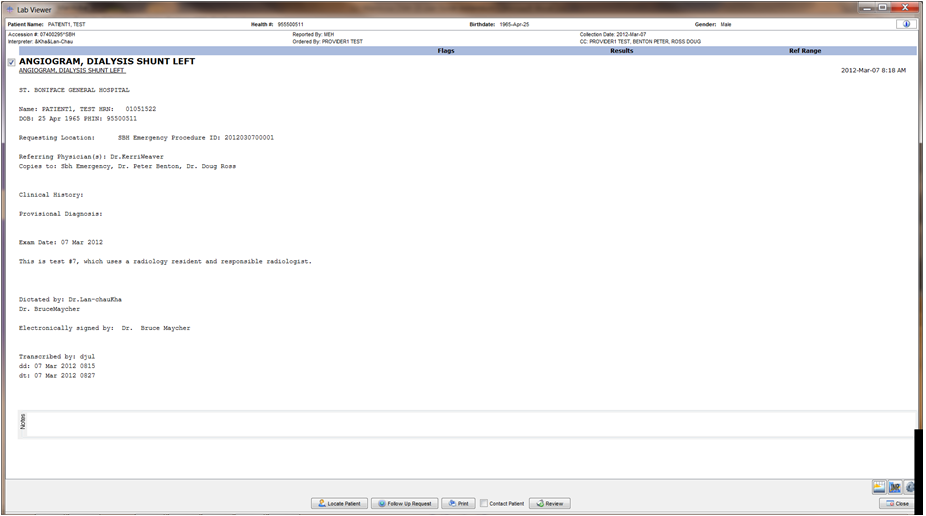
- Similar to lab results, clicking on a specific Diagnostic Imaging report will open up the viewer window to either print or view the report on screen.
Questions and Support
For Accuro Support, or to arrange training on this process, please go to Help > Send Feedback in Accuro or call Accuro at 1-866-729-8889.
Download a Lab Requisition Form
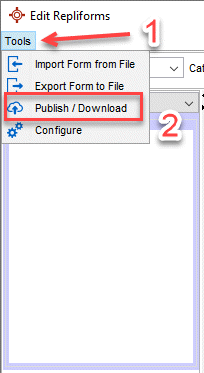
- Press and release the Alt Key, click Tools and select Form Editor from the list displayed.
- In the new window select Tools and then Publish/Download.
- Type in a key word (e.g. lab, lab requisition or even the name of the lab your clinic uses), select a Category such as Standard Forms or Requisition Forms, and click the Search button
 .
.
Note: To browse you can click the Search button without typing in search word. This displays all forms available for download.
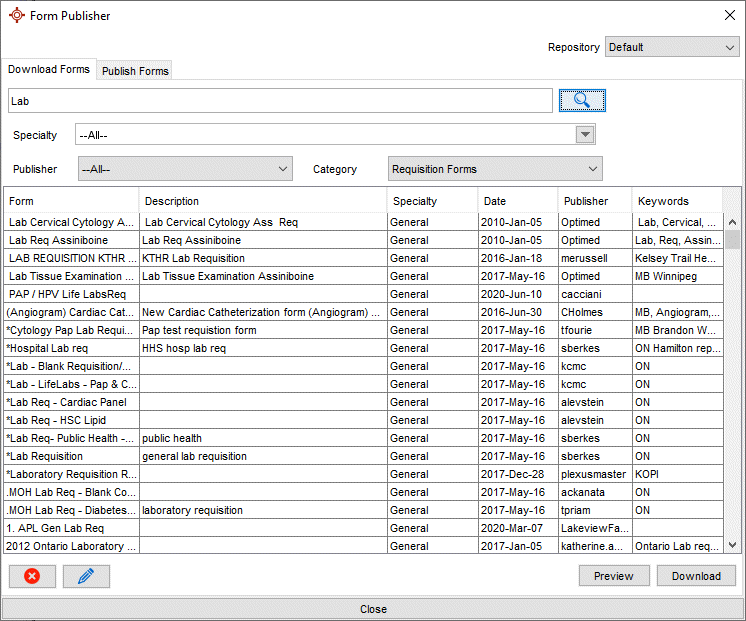
- Select a lab requisition, click Preview, and a new window will open the form. Close the form once done previewing.
- To download the form click Download.
- Click Close to exit.
The lab requisition now appears in the Form Editor under the same category from which you downloaded it from.
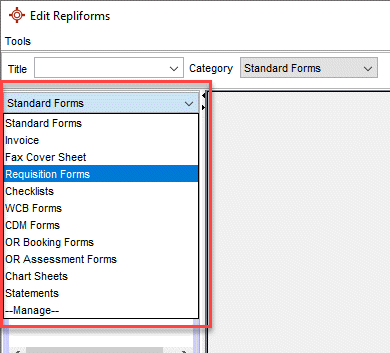
Note: You can filter the available forms by Category and / or Author by selecting the filter from the appropriate dropdown list.
Order a Lab for a Patient
- Click the EMR button
 on the Navigation bar.
- Click the Encounter Notes tab.
- Click the
 in the Clinical Notes section and select the appropriate lab from the Requisition Form section. The current patient's details are completed along with the current physician.
- Complete the Laboratory Requisition, as required.
- Click the Print button.
- Select the appropriate printer and click OK. Once the form has been printed it can be handed to your patient.
Add a Lab in Encounter Notes
To access Lab Tests, click here. To access Lab Results click here. These items were accessed from within Encounter Notes and have been moved to the Configuration menu at the top of the Accuro window.
- Click the EMR button on the Navigation bar.
- Select the Encounter Notes or the Chronic Conditions tab.
- Click the Add button
 . The Lab Tests window is displayed.
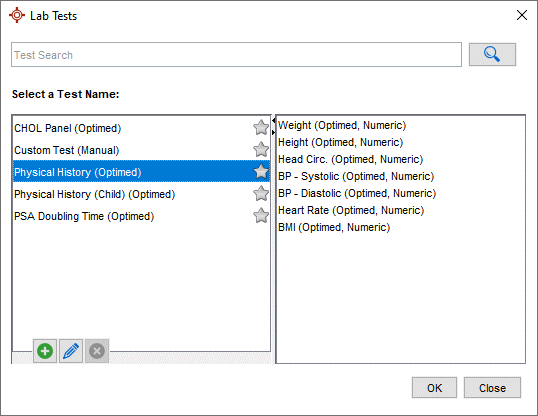
- Select the appropriate Lab Result from the list displayed. You can also type in the name of the lab result and click the Search button .
- Click the OK button. The Lab Results Entry window is displayed.
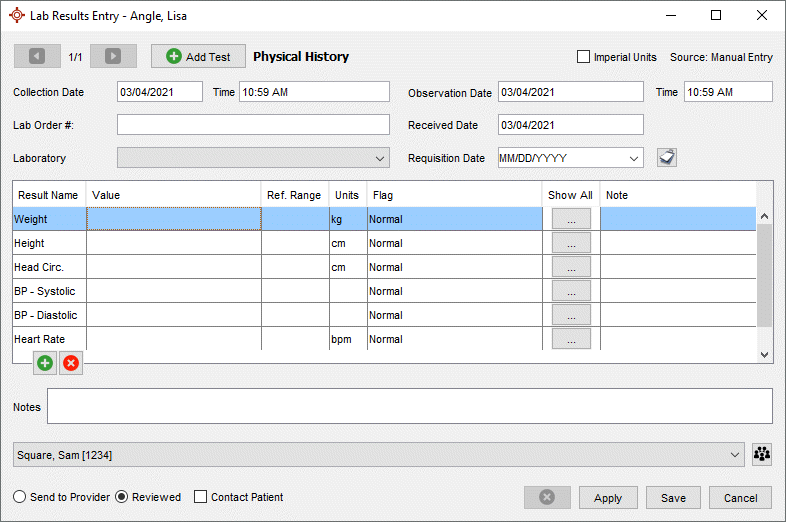
- Type in the lab information in the fields at the top of the window.
- Type in the results in the fields displayed.
- To add multiple result entries, click the Add Test button
 .
.
- If a field you want is not displayed, click the Add button to add the test result. The Lab Result Search Window is displayed.
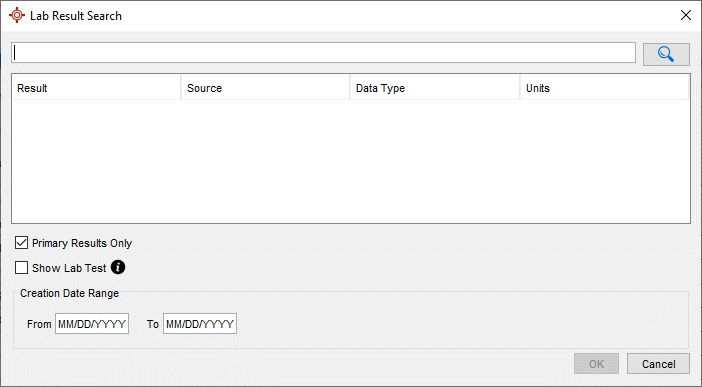
- Type in the name of the test and click the Search button .
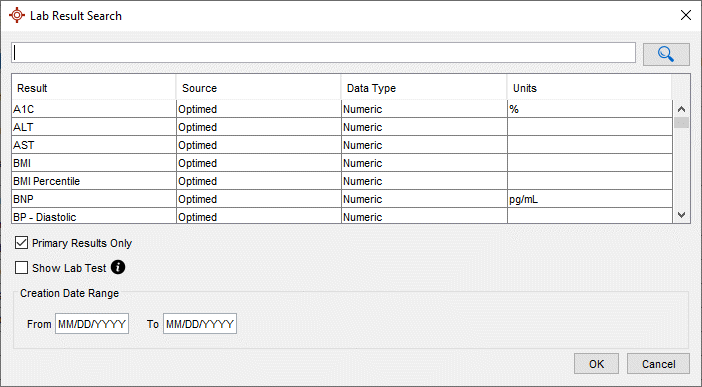
- Click to select the required test and click OK. This test is now included in the table. Type in the results.
- Select the Provider.
- Apply and Save to save your results and close the window.
Note: If multiple tests are being saved, the Save button  will display as a Save All button
  .
.
Edit a Lab in Encounter Notes
To access Lab Tests, click here. To access Lab Results click here. These items were accessed from within Encounter Notes and have been moved to the Configuration menu in the Accuro Start menu (press and release the Alt key on the keyboard).
- Click the EMR button on the Navigation bar.
- Select the Encounter Notes or the Chronic Conditions tab.
- Click the Edit button
 . The select Test window is displayed.
- Click the and select the appropriate Manual Lab Test from the list displayed. The Lab Results Entry window is displayed.
- Update the lab information in the fields at the top of the window, if required.
- Type in to change the results in the fields that need editing.
- If a field you want is not displayed, click the Add button to add the test result. The Lab Result Search Window is displayed.
- Type in the name of the test and click the Search button .
- Click to select the required test and click OK. This test is now included in the table. Type in the results.
- Select the Provider, if this needs changing.
- Apply and Save to save your changes and close the window.
Note: If multiple tests are being saved, the Save button will display as a Save All button .