Faxing
Accuro sends faxes through Microsoft Fax Console, which is located on your fax computer. There are two main stages that a fax goes through. First it must be sent from this Fax Queue window. Then from here it goes over your network to your selected fax computer where it relies on Microsoft Fax to accept and then send the fax. Accuro can see what is happening to the faxes in Microsoft Fax and displays that status in the MS Fax Status column. This same information can be seen directly in the Microsoft Fax Console providing you are logging on to your fax computer with the correct user.
Fax Status Definitions:
Main Fax Status definitions
WAITING: fax is waiting to be sent by user
QUEUED: fax has been sent by user, waiting its turn to be picked up by MS Fax for transmission
SENT TO CONSOLE: fax has been sent to MS Fax for transmission
Main MS Fax Status definitions
PENDING: fax is waiting its turn to be transmitted
IN PROGRESS: fax is transmitting
COMPLETE: fax has been successfully sent
Once the fax is sent to MS fax the status is set to "Sent to Console" and the MS fax status is set to "Pending".
When the fax has left the fax queue, the status remains "Sent to Console" but the MS Fax Status is changed to "Complete".
The fax console sends back some statuses and those are placed into the Status field.
The full list is:
PENDING, IN PROGRESS, FAILED, PAUSED, NO LINE, RETRYING, RETRIES EXCEEDED, COMPLETED, CANCELED, CANCELING, ROUTING
Routing, canceling and the 2 retrying statuses are not very common to see because they only show up for a few seconds before another status is shown like failed or in progress.
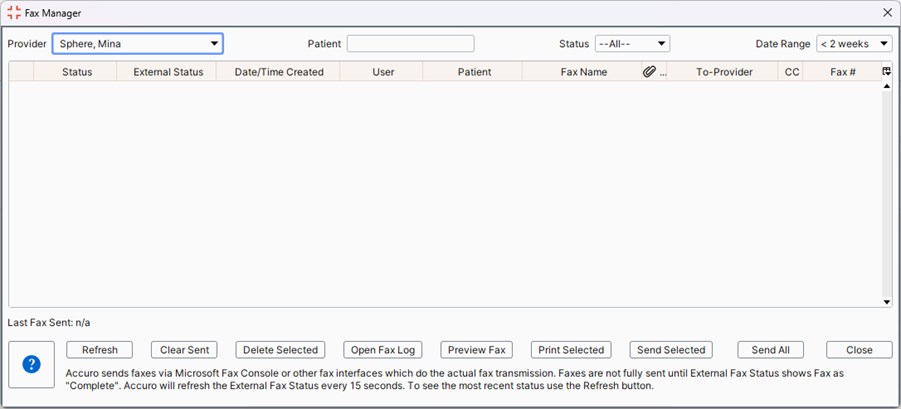
Fax Manager
The Fax Manager allows the user to see faxes that are queued and their status. Within the Fax Manager the user can:
- Clear sent faxes
- Delete a selected fax
- Open the fax log
- Preview a fax
- Print a selected fax
- Send a Selected fax
- Send all faxes
The display can be filtered to view for a selected Provider or for All Providers. The user can also select to view all faxes, Sent, Queued, Waiting or Failed faxes.
 See Administration - Basics on Accuro Learning Academy (ALA) for additional help on this topic! See Accuro Learning Academy for access.
- Faxes can now be sorted by selecting the appropriate column header.
- Users can now use the shortcut Ctrl+F to find something in the fax queue.
- Users can now customize the display by hiding/showing columns. This can be done by clicking the Column Display button located directly above the scroll bar.
- The last two weeks of faxes are now displayed by default. Users can view faxes of a different age by selecting the appropriate option from the Sent Faxes Age dropdown. If this option is changed then Accuro remembers the selection for next time the Fax Manager is opened.
- The column header Office is for clients with more than one office, it enables them to see which office sent the fax to the fax manager.
Access the Fax Manager
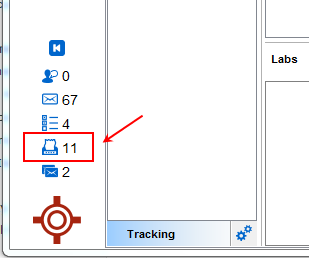
To access the Fax manager click the Faxes link located at the bottom-left of the Accuro window.
Filter the Fax Manager View
- Click the Faxes link at the bottom-left of the Accuro window to open the Fax Manager.
- Click the
 to the right of Provider and select the appropriate Provider or select all.
- Click the to the right of Status and select the status of the faxes you are interested in, the default is All.
- Click the to the right of Sent Faxes Age and select the age of the faxes you are interested in, the default is less than 2 weeks old.
Find an Item in the Fax Queue
- Click the Faxes link located at the bottom-left of the Accuro window.
- Press Ctrl+F to find an item in the fax queue.
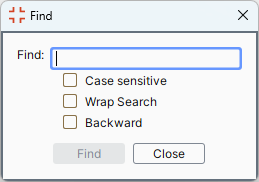
- Type in the item being searched for and select checkboxes, as appropriate.
- Click the Find button.
Delete a Selected Fax
- Click the Faxes link at the bottom-left of the Accuro window to open the Fax Manager.
- Click the to the right of Provider and select the appropriate Provider or select all.
- Click the to the right of Show and select the status of the faxes you are interested in.
- Click the checkbox to the left of the fax being deleted.
- Click Delete Selected. A confirmation message is displayed.
- Click Yes to delete the selected fax.
Open the Fax Log
- Click the Faxes link at the bottom-left of the Accuro window to open the Fax Manager.
- Click the Open Fax Log button. The Fax Log window is now displayed.
- Click Close when you have finished viewing the information.
Preview a Fax
- Click the Faxes link at the bottom-left of the Accuro window to open the Fax Manager.
- Click the to the right of Provider and select the appropriate Provider or select all.
- Click the to the right of Show and select the status of the faxes you are interested in.
- Click the checkbox to the left of the fax being previewed.
- Click Preview Fax. From the preview you can scroll through the pages of the fax or print a copy of the fax.
- Click the
 in the top-right corner of the preview window to close the fax preview.
Print Selected Fax
- Click the Faxes link at the bottom-left of the Accuro window to open the Fax Manager.
- Click the to the right of Provider and select the appropriate Provider or select all.
- Click the to the right of Show and select the status of the faxes you are interested in.
- Click the checkbox to the left of the fax being printed.
- Click Preview Selected.
Note: You can select more than one fax to print at a time, if required.
- Select the appropriate printer and click Print.
Send Selected Fax
- Click the Faxes link at the bottom-left of the Accuro window to open the Fax Manager.
- Click the to the right of Provider and select the appropriate Provider or select all.
- Click the to the right of Show and select the status of the faxes you are interested in.
- Click the checkbox to the left of the fax being sent.
- Click Preview Selected.
Note: You can select more than one fax to send at a time, if required.
- Click Send Selected.
Send All Faxes
- Click the Faxes link at the bottom-left of the Accuro window to open the Fax Manager.
- Click the to the right of Provider and select the appropriate Provider or select all.
- Click the to the right of Show and select the status of the faxes you are interested in.
- Click Send All.
Clear Sent Faxes
- Click the Faxes link at the bottom-left of the Accuro window to open the Fax Manager.
- Click the Clear Sent button. A Clear Sent message is displayed.
- Click Clear All or Clear Selected depending upon whether you want to clear all your sent faxes or only selected ones.
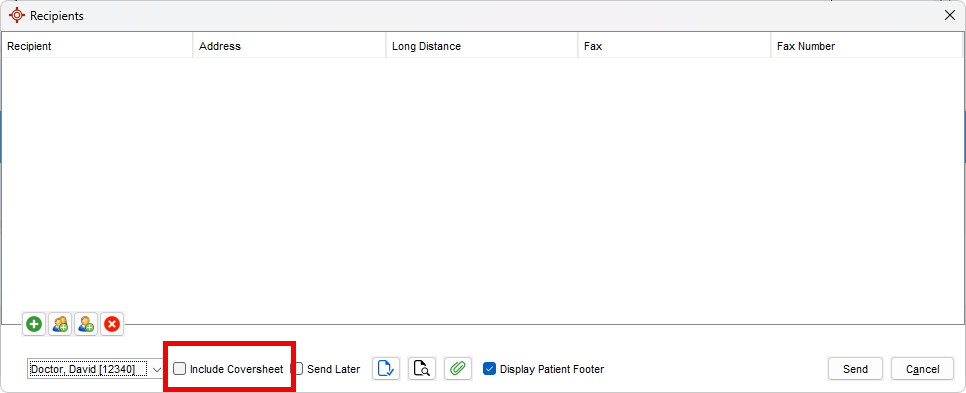
Add a Fax Cover Sheet
Cover sheets can be added from following multiple sections within Accuro when faxing documents:
- In the Recipients window, select Include Cover Sheet to include a Coversheet when faxing the required document.
Edit a Fax Cover Sheet
- Press and release the Alt key, click Tools and select Form Editor from the list displayed.
- Click Standard Forms to select the Fax Cover Sheet form type.
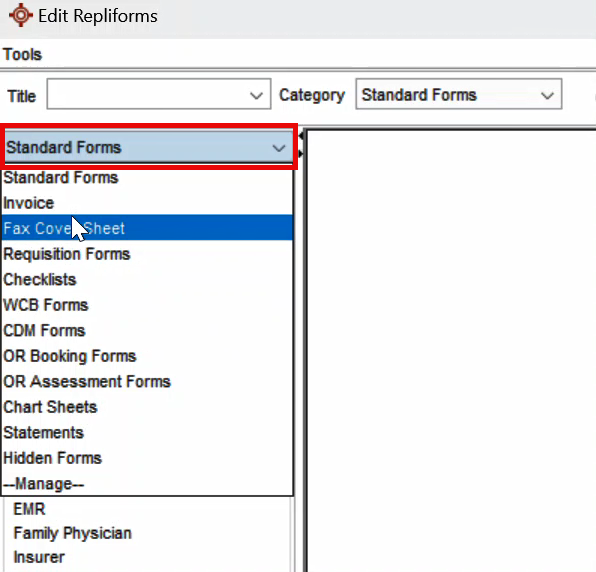
- Double-click to open the Fax Cover Sheet form from the list displayed.
- Double-click the categories in the left side panel under Saved Components.
- Drag and drop components that are needed to the cover sheet in the required position.
- Save Fax Cover Sheet form after making all the required changes.
- Click Close when you have finished.