Formula on Forms
QHR Technologies can build your form for you. For more information, please visit Forms - QHR Form Building Service. Please note that there may be a charge associated with form creation.
Demographic Constraints
The demographic constraints can include any or all of the following:
- Age greater than
- Age less than
- Age between
- Age equals
- Sex Male
- Sex Female
- Custom Patient Field Equals
- Custom Patient Field Contains
Algebraic Expressions
The following algebraic expressions can be used:
- Brackets ()
- Square Roots SQRT
- Exponents ^
- Division /
- Multiplication *
- Addition +
- Subtraction –
- Log
- Ln (Natural Log)
Add a Formula to a Form and Save as a Lab Value
- Press and release the Alt key, click Tools and select Form Editor from the list displayed.
- Click the Create a New Form button
 .
.
- Add the components required to the form.
- To add the Formula to the form double-click Components in the Saved Components section of the lilac Accuro Navigation bar, click and drag FormulaField onto your form.
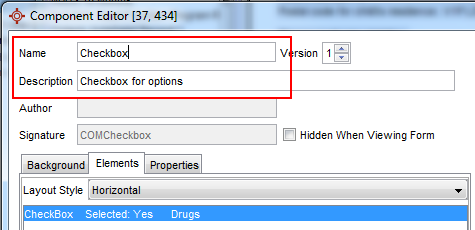
- Right-click on the FormulaField you have just added and select Edit. The Component Editor window is displayed.

- In the Name field type in the formula name,
- In the Description field, type in a description of the formula (e.g. eGFR calculation).
- In the Tag field, type in a tag to be assigned to the formula, if required.
- In the Constraints section, click the Add button
 .
.
- Type in your formula in the Edit Formula field below. You will see the formula you are typing appears in the Formula field of the spreadsheet above.
- Click to select any Demographic Constraints, as required.
- If the formula result should be saved as a lab, follow steps 13 – 17, otherwise go to step 18.
- Click to select the Save as Lab Value checkbox.
- Click the Edit button to the right of the Save as Lab Value checkbox.
- Click the down-arrow to select the Lab Test.
- Click the down-arrow to select the Lab Result.
- Click OK.
- Check to ensure all the formula details and constraints are correct. Click OK.
- Make any remaining changes to the form you are creating and click the Save button.
Make Components Available on Another Form
These procedures assume that you are already in the Form Editor with the form containing the component open. There are two different ways you can make components available on another form. Use Option 1 if there is only one or two components you want made available to other forms. If you want a lot of components made available to another form, use Option 2.
Option 1
- Select the component you want to make available to other forms.
- Drag and drop the selected component into the Custom Components area of the Components toolbox.

- Click on the component that is now displayed and click the Save Component button at the bottom of the Component toolbox.

This component is now available to add to other forms.
- Right-click on the component and select Edit to add a Name and description to make the component easily identifiable.
Option 2
- Click the New Form button
 .
.
- Click the Copy Existing Form radio button and select the form you want to use as the base form.

This opens up the editor with a copy of the selected form. This form can then be edited to suit your clinic's requirements.
Delete Components From a Form
- Press and release the Alt key, click Tools and select Form Editor from the list displayed.
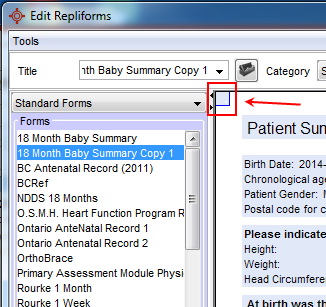
- Click to select the form type where the form you want to delete components to is stored.
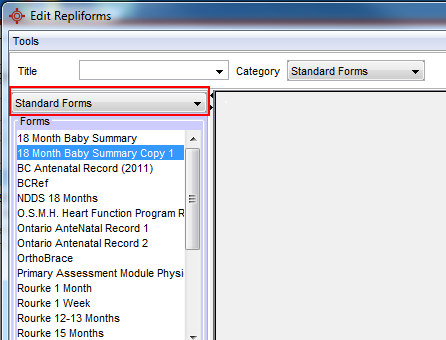
- Double-click to open the form from the list displayed.
- Double-click the categories in the left side panel containing the component being deleted.
- Right-click on the component you want to delete and select Remove from the list displayed. A deletion confirmation message is displayed:

- Click Yes to continue.
Repeat this for any other components you want to remove.
- Click Close when you have finished.
Add a Lab Component to a Form
- Press and release the Alt key, click Tools and select Form Editor from the list displayed.
- Click to select the form type where the form you want to add components to is stored.
- Double-click to open the form from the list displayed.
- Double-click Labs in the Components section.

- Double-click the folders to open, select the component that you want to add to your form. Drag the component on to the form to the position of choice.
The component appears on the form outlined with a light blue border. Repeat for as many components as are required.
Add a Background or Watermark to a Form
- Press and release the Alt key, click Tools and select Form Editor from the list displayed.
- Click to select the form type where the form you want to add components to is stored.
- Double-click to open the form from the list displayed.
- Double-click the category called Component and select Watermark from the list displayed.

- Drag the Watermark component onto the form.
- Drag the component on to the form to the position of choice.
- Right-click on the small square that appears in the top left hand corner of the form.
- Select Edit, this brings up the Component Editor window.
- Using the Ellipses button
 beside the Background field, browse for the background you want to pull into your form.
- Select and click Open.
- Click the Resize button to resize the document's DPI to the correct resolution as well as add the printer background in its correct resolution.
- Click OK to save your changes.
- Click Close when you have finished.