Private Billing in Quick Appointments View
- Press and release the Alt key, click Tools and select Quick Appointment View from the list displayed. The Quick Patient Appointment View window is displayed.
Note: The shortcut to display the Quick Appointment View is F4.
- Click the Private Billing tab. The patient's private billing is displayed.
Remove a Credit from a Private Billing Account (Refund)
- Press and release the Alt key, click Tools and select Quick Appointment View from the list displayed. The Quick Patient Appointment View window is displayed.
Note: The shortcut to display the Quick Appointment View is F4.
- Click the Private Billing tab. The patient's private billing is displayed.
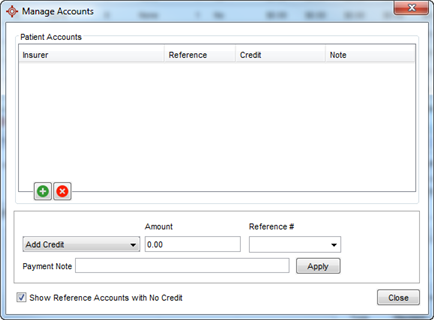
- Click the Manage Accounts button. The Manage Accounts window is displayed:

- Click
 and select the Remove Credit (Refund) from the list displayed.
- In the Amount field, type in the amount of the credit.
- Click and select the Reference #, if applicable.
- Type in a Payment Note, if required.
- Click the Apply button to apply the credit to the patient's account.
- Click the Close button to close the Manage Accounts window.
Remove a Credit from a Private Billing Account (Correction)
- Press and release the Alt key, click Tools and select Quick Appointment View from the list displayed. The Quick Patient Appointment View window is displayed.
Note: The shortcut to display the Quick Appointment View is F4.
- Click the Private Billing tab. The patient's private billing is displayed.
- Click the Manage Accounts button. The Manage Accounts window is displayed:
- Click and select the Remove Credit (Correction) from the list displayed.
- In the Amount field, type in the amount of the credit.
- Click and select the Reference #, if applicable.
- Type in a Payment Note, if required.
- Click the Apply button to apply the credit to the patient's account.
- Click the Close button to close the Manage Accounts window.
Create a Private Billing Statement
- Press and release the Alt key, click Tools and select Quick Appointment View from the list displayed. The Quick Patient Appointment View window is displayed.
Note: The shortcut to display the Quick Appointment View is F4.
- Click the Private Billing tab. The patient's private billing is displayed.
- Click the Statement button. The Date Range window is displayed:
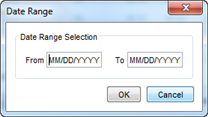
- Double click the From and To fields and select the appropriate dates from the calendars displayed. Click OK. The statement is displayed.
- To print out click the Print button
 .
.
- Select your preferred printer and click OK.
Create a Private Billing Invoice
- Press and release the Alt key, click Tools and select Quick Appointment View from the list displayed. The Quick Patient Appointment View window is displayed.
Note: The shortcut to display the Quick Appointment View is F4.
- Click the Private Billing tab. The patient's private billing is displayed.
- Click the Invoice button. The invoice is displayed.
Create a Private Billing Receipt
- Press and release the Alt key, click Tools and select Quick Appointment View from the list displayed. The Quick Patient Appointment View window is displayed.
Note: The shortcut to display the Quick Appointment View is F4.
- Click the Private Billing tab. The patient's private billing is displayed.
- Click the Receipt button. The receipt is displayed.
Record a Payment in Private Billing
- Press and release the Alt key, click Tools and select Quick Appointment View from the list displayed. The Quick Patient Appointment View window is displayed.
Note: The shortcut to display the Quick Appointment View is F4.
- Click the Private Billing tab. The patient's private billing is displayed.
- In the Record Payment section type in the Amount and Date (the default is today).
- Click and select the payment Type from the list displayed.
- Click and select the Pay By method from the list displayed.
- Click and select a Reference, if required.
- Type in any notes in the blank text field, if applicable.
- Click the Pay button.