Configure Medical History
Configure Histories is one of the many ways you can configure your Accuro software. The setup you have in this area of Accuro determines what you have displayed in the Medical History on the Encounter Notes tab.
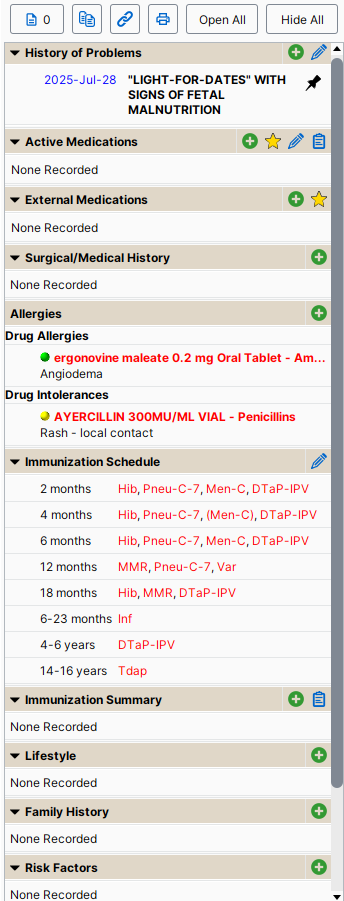
You can enable or disable bands of history type so the display best suits your office requirements. Bands that can be enabled or disabled are:
- History of Problems
- Active Medications
- External Medications Surgical history
- Allergies
- Immunization Schedule
- Immunization Summary
- Lifestyle
- Family History
- Risk Factors
You also have the option of being able to add customized bands if you cannot see the required band.
Edit Custom History Type
- Press and release the Alt button on the keyboard, click Users and select Manage Security from the list displayed.
- Click the System Settings tab on the left-hand side of the window.
- Click the Configure Histories button.

- The Edit Custom History Types window is displayed.
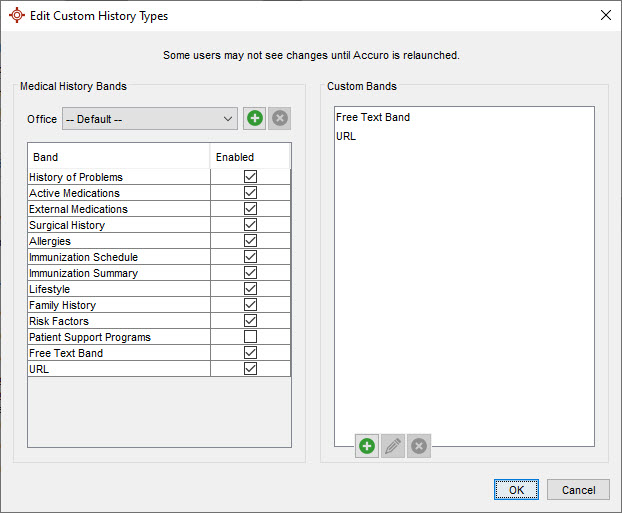
- Bands with the checkboxes selected
 are enabled. To disable a band, click the checkbox and the tick disappears
  .
.
- Click OK to save your changes.
Note: You may need to restart Accuro for these changes to take effect.
Add Custom Bands
- Press and release the Alt button on the keyboard, click Users and select Manage Security from the list displayed.
- Click the System Settings tab on the left-hand side of the window.
- Click the Configure Histories button. The Edit Custom History Types window is displayed.
- Click the Add button
 . The Edit Custom History Types window is displayed.
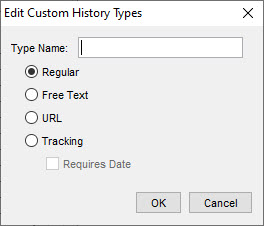
- Type in the name of the custom history type.
- Select the history type from Regular, Free Text, URL or Tracking.
Note: If you select Tracking you can also select the requires date checkbox.
- Click OK to save your changes.
Note: You may need to restart Accuro for these changes to take effect.
Delete Custom Bands
- Press and release the Alt button on the keyboard, click Users and select Manage Security from the list displayed.
- Click the System Settings tab on the left-hand side of the window.
- Click the Configure Histories button. The Edit Custom History Types window is displayed.
- Click to select the custom band.
- Click the Remove button
 . The custom band you selected is deleted from the list displayed.
- Click OK to save your changes.
Note: You may need to restart Accuro for these changes to take effect.
Create Clinic Specific Medical History Bands.
- Press and release the Alt button on the keyboard, click Users and select Manage Security from the list displayed.
- Click the System Settings tab on the left-hand side of the window.
- Click the Configure Histories button. The Edit Custom History Types window is displayed.
- Click the Add button to the right of the Office dropdown to add an office.
- When new medical bands are created, you will be prompted, "Should this Medical History band only be available for the selected office?" If No is selected it is available to all offices. If Yes is selected the band is only available for the selected office.
- Type in the name of the custom history type.
- Select the history type from Regular, Free Text, URL or Tracking.
Note: If you select Tracking you can also select the requires date checkbox.
- Click OK to save your changes.
Note: You may need to restart Accuro for these changes to take effect.
Add an Office for Clinic Specific Medical History Bands
In order to have Medical History bands specific to your clinic, you need to add your clinic.
- Press and release the Alt button on the keyboard, click Users and select Manage Security from the list displayed.
- Click the System Settings tab on the left-hand side of the window.
- Click the Configure Histories button. The Edit Custom History Types window is displayed.
- Click the Add button to the right of the Office dropdown to add an office.
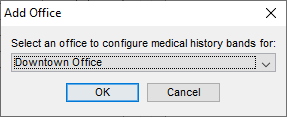
- Select the office and click OK.
Note: You may need to restart Accuro for these changes to take effect.
Remove an Office for Clinic Specific Medical History Bands
- Press and release the Alt button on the keyboard, click Users and select Manage Security from the list displayed.
- Click the System Settings tab on the left-hand side of the window.
- Click the Configure Histories button. The Edit Custom History Types window is displayed.
- With the desired selected Office, click the Remove button .
- A warning message is displayed, click Yes to continue.