Admin Delete
Admin Delete is a very powerful feature of Accuro; this is where you delete a patient's entire chart and appointment history.
Great care should be taken using this tool because once the patient's chart and appointment history has been deleted, it has gone and this process is not reversible.
- Press and release the Alt button on the keyboard, click Users and select Manage Security from the list displayed.
- Click the Admin Delete tab on the left-hand side of the window.
- Type in the name of the patient to be deleted and select from the list displayed.
- Click the Delete Patient button.
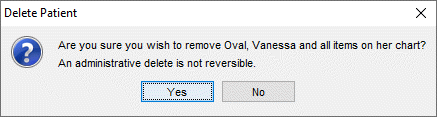
- A warning message is displayed. Click Yes to continue.
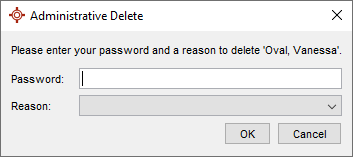
- Type in your Accuro password and click
 and select the reason for deleting this patient from the list displayed.
- Click OK. The patient has now been deleted.
- Click OK.
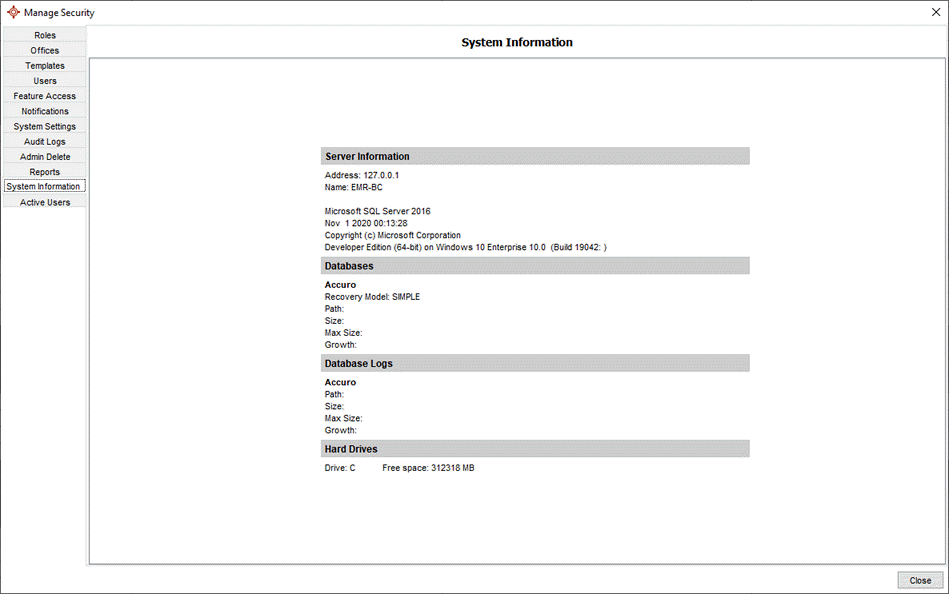
System Information Tab
The System Information tab displays the SQL server version, lists the size of the data and log files for each Accuro database and the path name for each.
To access the System Information tab:
- Press and release the Alt button on the keyboard, click Users and select Manage Security.
- Click the System Information tab.
Active Users Tab
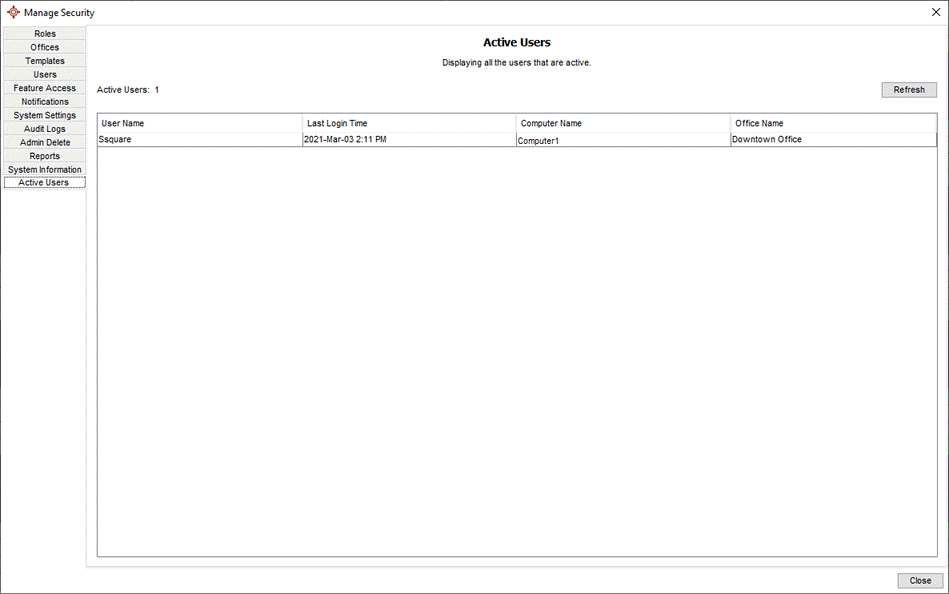
The Active Users tab lists any user who has used Accuro within the last two minutes. As well as the user, their IP address, computer name and last login time are also recorded. This tab also identifies when one user is logged into multiple computers. When users are viewing this table they can also click the Refresh button to update the information.
To access the Active Users tab:
- Press and release the Alt button on the keyboard, click Users and select Manage Security.
- Click the Active Users tab.
Reports
Three reports are available in Manage Security to users with system administration access:
- Active User Report: Generates a report grouped by clinic and then by username in alphabetical order. The information included in this report is username, role(s) in the clinic and last successful login (date and time)
- System Access Report: Generates a report of active and inactive user activity in the EMR between specified dates and times (that can be configured by a user with system administrator access). This lists users in Accuro at any given time. The report groups by clinic and then by username in alphabetical order, role(s) in the clinic and most recent activity in the time frame specified.
- Same Last Name Access Report: Generates a report grouped by clinic and then by username in alphabetical order. The information contained in this report is username, role(s) in the clinic, Activity Name, event date and time, patient's first name, gender, date of birth, unique patient ID. This report is to show patients accessed who have the same last name as a user.
To access the three reports described above, follow the procedure below:
- Click Users on the Menu bar and select Manage Security from the list displayed.
- Click the Reports tab on the left-hand side of the window.
- Click to select the required report.

- Complete the information as required.
- Click the Run Report button.
- Repeat for the other reports, as required.
- Click Close when completed.
Reassign Tasks
Reassign Tasks is a feature which allows incomplete tasks to be transferred from one staff member to another. You also have the option of selecting a Due After or a Due Before date.
- Press and release the Alt button on the keyboard, select Re-Assign Tasks from the list displayed. The Re-Assign Tasks window is displayed.
- Click the and select the member of staff you are transferring the tasks from.
- Click the and select the member of staff you are transferring the tasks to.
- Double-click the Due After field and select from the calendar displayed, if required.
- Double-click the Due Before field and select from the calendar displayed, if required.
- Click the Reassign button. A confirmation message is displayed and the tasks have been reassigned.
- Click OK to close the message.