Override GST, HST or PST
Depending upon the province your office is in, you charge GST, PST or HST. It is possible to override any of these and manually enter a percentage amount to be charged.
- Click the Claims button
 on the Accuro Navigation bar.
- Right-click on the appropriate claim and select Options from the list displayed.
Note: This option is available in any of the tabs in the Claims section.
- Select from one of the following Override GST, Override PST or Override HST, as applicable to your province.
- Enter the Override GST/PST or HST Percentage and click OK.
Mark a Claim as Invoiced
- Click the Claims button on the Accuro Navigation bar.
- Click the Daily Claims or Unsubmitted Claims tab.
- Right-click on the appropriate claim and select Options from the list displayed.
- Select Mark as Invoiced.
- Click to select an invoice date from the calendar displayed.
Setting a Claim to No Charge, No Show, Adjust-to-Paid, Write-Off
No Charge: is used for anything that was billed incorrectly or for a service the Provider does not want to charge.
No Show: is used when a patient does not show for their appointment.
Adjust-to-Paid: is used for any overpayments or underpayments. It assumes the amount paid is correct and adjusts the billed amount to the paid amount.
Write-Off: is for claims that should have been paid, but have not. A Write-Off report can be submitted for tax purposes at year end.
- Click the Claims button on the Accuro Navigation bar.
- Click to select the appropriate tab.
- Right-click on the appropriate claim and select Options from the list displayed.
Note: On some tabs you may not need to select Options.
- Select one of No Charge, No Show, Adjust-to-Paid, or Write-off, as appropriate. The claim is updated based on the selection made.
Note: If you select either Write-off or Adjust-to-paid, you will be prompted to select a reason.
Viewing a Claim's Associated Appointment
If a claim was made from an appointment in the Scheduler, you can quickly view that appointment.
- Click the Claims button on the Accuro Navigation bar.
- Click the Unsubmitted Claims tab.
- Right-click on the appropriate claim and select View from the list displayed.
- Click Go To Appointment. The Scheduler opens at the appointment that created the selected claim.
View Claim Details
- Click the Claims button on the Accuro Navigation bar.
- Click to select the appropriate tab.
- Right-click on the claim and select Claim Details.
Change the Claim Percentage
- Click the Claims button on the Accuro Navigation bar.
- Click the appropriate tab.
- Double-click on a claim that needs the claim percentage changed to open up the Claim Details window.
- Click the dropdown
 and select the Percentage from the list displayed.
Note: The default value is 100%.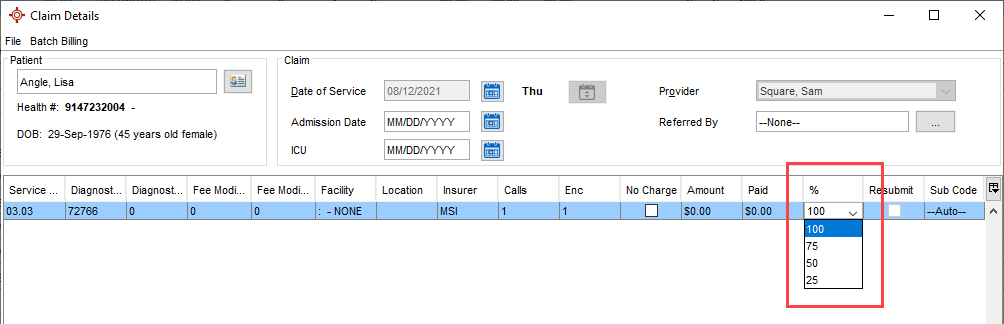
View a Claim's History
- Click the Claims button v on the Accuro Navigation bar.
- Click to select the tab containing the claim.
- Right-click on the appropriate claim and select Claim History from the list displayed.
View or Change a Claim's Referring Provider
- Click the Claims button on the Accuro Navigation bar.
- Click to select the appropriate tab.
- Double-click on the claim to open up the Claim Details window.
- Click the dropdown list to the right of Referred By and select the correct Referring Provider from the list displayed.
- Click Save and Close to save your changes and close the window.
Set the Specialty for a Claim
- Click the Claims button on the Accuro Navigation bar.
- Click to select the appropriate tab.
- Double-click on the claim to open up the Claim Details window.
- Click the dropdown list and select the Specialty from the list displayed.
- Click Save and Close to save your changes and close the window.
Set the Location for a Claim
- Click the Claims button on the Accuro Navigation bar.
- Click to select the appropriate tab.
- Double-click on the claim to open up the Claim Details window.
- Click the dropdown list to the right of the Location field in the Details section and select the correct Location from the list displayed.
- Click Save and Close to save your changes and close the window.
Add a Sub-Procedure to a Claim
- Click the Claims button on the Accuro Navigation bar.
- Click to the Daily Claims or Unsubmitted Claims tab.
- Right-click on the appropriate claim and select New Procedure. This adds a new procedure underneath the selected claim.
- Complete the claim details, as required.
Change the Date
- Click the Claims button on the Accuro Navigation bar.
- The date is displayed at the top of the window, irrespective of the tab being viewed.
- Select the Year, Month, and Day by clicking the dropdown list and selecting from the list displayed. Alternatively, you can select the date by clicking the Calendar button and selecting the date in the calendar displayed.
Change the Provider Displayed
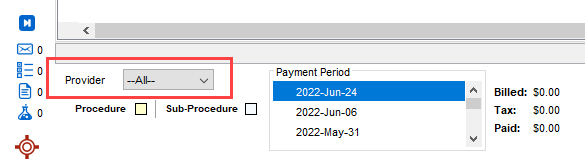
To change the Provider, click the dropdown list at the bottom-left of the window and select a different Provider from the list displayed.
Validating Claims (MB)
Although only certain users in a clinic are able to submit claims. Accuro allows other users to be able to Validate the claims prior to submission. To validate your claims, follow the procedure below:
- Click the Claims button on the Accuro Navigation bar.
- Click the Daily Claims or Unsubmitted Claims tab.
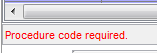
Note: Claims can be checked by clicking on them, if anything is missing from the claim it is displayed in red text at the bottom of the window.
- To validate the claims displayed, click the Approve Claims button
 . The Submit Claims window is displayed.
- Click the Data Center number to select the appropriate data center.
Note: If any claims require attention they are displayed along with a reason why they have been listed. These must be fixed before you can proceed with validating the claims.