 See Communication and Documents - Core for Healthcare Providers and Documents and Labs on Accuro Learning Academy (ALA) for additional help on this topic! See Accuro Learning Academy for access.
Labs is the inbox for all the electronic lab results received in your clinic. Each Provider has their own labs folder. There is also an Unassigned folder, this contains labs that Accuro was unable to assign to a specific Provider. It is important to check the Unassigned folder regularly and make sure that any labs it contains are assigned to the appropriate Provider so they may be reviewed and filed on a patient's EMR.
In the Provider folder, view the lab results, the date received, whether Accuro was able to match the lab with a patient, the type of test, whether the labs had abnormal results, whether it has been reviewed, and if a patient needs to be contacted.
Within each Provider's folder there may be one folder or there could be several. This depends upon where the labs come from and also the format in which they are sent.
The first format, HL7 (e.g. hematology), ends up in the Provider's main folder. These are the kind of labs that provide results for the lab summary pane in Encounter Notes.
The second format is either images or large blocks of text (e.g. biopsies). These often end up in the lab documents folder along with faxed labs.
There may be other examples not mentioned above.
Labs that have been received but have not yet been viewed appear bold in the Inbox and have "NEW" in the Reviewed column of the Virtual Chart until the lab is read.
When using the locate patient option in the labs inbox, a check is made to see if the selected labs contain patients with different names and health numbers (because some labs send back results for more than one patient in a single file). If more than one name or health number is found then a warning message is displayed to notify the user.
See Communication and Documents - Core for Healthcare Providers and Documents and Labs on Accuro Learning Academy (ALA) for additional help on this topic! See Accuro Learning Academy for access.
 on the Accuro Navigation bar and select the Labs folder.
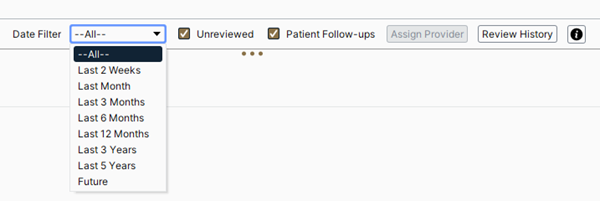
Note: To include Patient Follow-ups, select the appropriate checkbox.
on the Accuro Navigation bar and select the Labs folder. . on the Accuro Navigation bar and select the Labs folder..
Some labs when received are marked Unmatched. This means Accuro doesn't know which patient the lab is intended for. In this case the need to me matched to the appropriate patient.
on the Accuro Navigation bar and select the Labs folder. on the Accuro Navigation bar and select the Labs folder. on the Accuro Navigation bar and select the Labs folder.Where a lab has been reviewed in error, it is possible to unreview the lab.
on the Accuro Navigation bar and select the Labs folder..Items can be marked as unread in the Labs, Documents, Tasks and Mail area of the Home section.
on the Accuro Navigation bar. on the Accuro Navigation bar and select the Labs folder.. on the Accuro Navigation bar and select the Labs folder. in the main window area to expand the results.
Users can compare two text lab report (text lab reports are those stored in the documents section of the virtual chart). The text lab reports can be compared in the documents section of the virtual chart or in the Labs area of the Home section. When comparing the lab reports are displayed side by side in the window allowing a physician reviewing the new lab to easily compare with older results.
To compare two lab reports from within the Home section follow the procedure below:
on the Accuro Navigation bar.To compare labs in the Virtual Chart follow the procedure below:
 on the Accuro Navigation bar.
Note: Labs can only be compared if they show up as labs in the Documents area of the Virtual Chart.
Lab results Graphing can be viewed from either Labs in the Home section or from Encounter Notes in the EMR section of Accuro. Follow either of the procedures below:
Creating a Lab Group from Within the Home Section of Accuro:
on the Accuro Navigation bar and select the Labs folder. at the bottom right-hand side of the window. Use the expand button in the main window area to expand the results.
 . you can filter by diagnosis or lab tests. To view a specific item e.g. weight, click to select from the list displayed.
 when completed.
Creating a Lab Group from Within the EMR Section of Accuro:
on the Accuro Navigation bar and click the Encounter Notes tab. in the main labs window area to expand the results. as shown on the image below: you can filter by diagnosis or lab tests. To view a specific item e.g. weight, click to select from the list displayed. when completed.
Enables users to identify quickly and easily when labs are not being received a log records the date and time of the last attempted download of labs and whether the downloads are successful or not. This information can be viewed in the home area of Accuro by pressing the information button. The lab log can be configured to warn if no lab retrievals are made in a defined timescale (default 3 days).
The 'Successes' column shows the number of successful items that were downloaded or processed during that run. The 'Failures' column is a yes/no indicating whether there was an issue in the batch of downloaded or processed labs. A failure is only logged if something unexpected happens, but there is no differentiation in the lab log between things that went wrong (e.g. a dropped connection or a file that failed to download etc.).
If there is a successful connection and no new labs, the success count will be 0 and 'Failures' will be no, because downloading 0 labs when 0 labs were available to download is not an error.
If there is a failure to connect, 'Failures' is yes and successes is 0. If the connection drops partway through, or one of the lab files isn't downloaded because of some error with the file or permissions or the server, or any other thing prevents Accuro from successfully downloading a file, then Failures is yes.
Note: Depending on what failed and when, it is possible to have successfully downloaded/processed files and still have a 'yes' in Failures.
The only time that it really matters is when Failures is constantly 'Yes'. If there are success counts along with it, then likely there's one file that's always failing; if there are always 0 successes, then there may be a connectivity or configuration issue. If there are occasional entries with a failure and subsequent entries did not fail, then it was a temporary issue and the file was successfully picked up on the subsequent run.
To access the lab log information:
on the Accuro Navigation bar. .
.